How Can I Clean My Beauty Blender
If you want your Beauty Blender to perform well and last longer, cleaning your Beauty Blender properly is essential. You’ll need to know the right techniques and products to remove makeup residue without damaging the sponge.
Skipping this step can lead to bacteria buildup and affect your skin’s health. Understanding how to clean it effectively will save you time and maintain your makeup’s flawless finish.
Let’s explore what you need to do.
Key Takeaways
- Wet the Beauty Blender with lukewarm water, apply a gentle cleanser, and work into a lather by pressing and squeezing.
- Focus on stained areas using circular motions; soak in warm soapy water for 10-15 minutes for deep stains before scrubbing again.
- Rinse thoroughly until the water runs clear and no residue or fragrance remains on the sponge.
- Dry the Beauty Blender in a well-ventilated area on a clean surface or breathable container, avoiding damp enclosed spaces.
- Clean the sponge after every use and replace it every three months to maintain hygiene and optimal performance.
Why You Should Clean Your Beauty Blender Regularly
Why should you clean your Beauty Blender regularly? Keeping your sponge clean prevents bacteria buildup, which can cause skin irritation or breakouts. Contrary to some cleaning myths, rinsing with water alone doesn’t effectively remove makeup residue or oils trapped inside.
Cleaning your Beauty Blender stops bacteria buildup and removes stubborn makeup residue for healthier skin.
You need a thorough cleaning routine to maintain hygiene and prolong your Beauty Blender’s lifespan. Additionally, improper storage tricks, like leaving it in a damp environment, encourage mold growth.
Instead, always store your Beauty Blender in a breathable container or on a clean surface where it can dry completely. By cleaning and storing it correctly, you ensure flawless makeup application every time, protect your skin health, and maximize the tool’s durability.
Regular maintenance is essential for both effectiveness and safety.
Essential Supplies for Cleaning Your Beauty Blender
Maintaining your Beauty Blender’s cleanliness starts with having the right tools on hand. You’ll need a gentle cleanser specifically designed for makeup sponges or a mild liquid soap. Avoid harsh detergents that could degrade the sponge.
A clean bowl or sink for soaking, and a soft towel for drying, are also essential. While unrelated to cleaning, applying sunscreen hacks before makeup prevents buildup on your sponge, reducing frequent washes.
Similarly, hair removal tips that emphasize gentle exfoliation can complement your skincare routine, keeping pores clear and makeup application smooth. Having these supplies ready ensures you maintain your Beauty Blender’s integrity and hygiene effectively.
Preparing properly sets the stage for an efficient cleaning process that preserves your sponge’s softness and performance.
How to Clean Your Beauty Blender Effectively
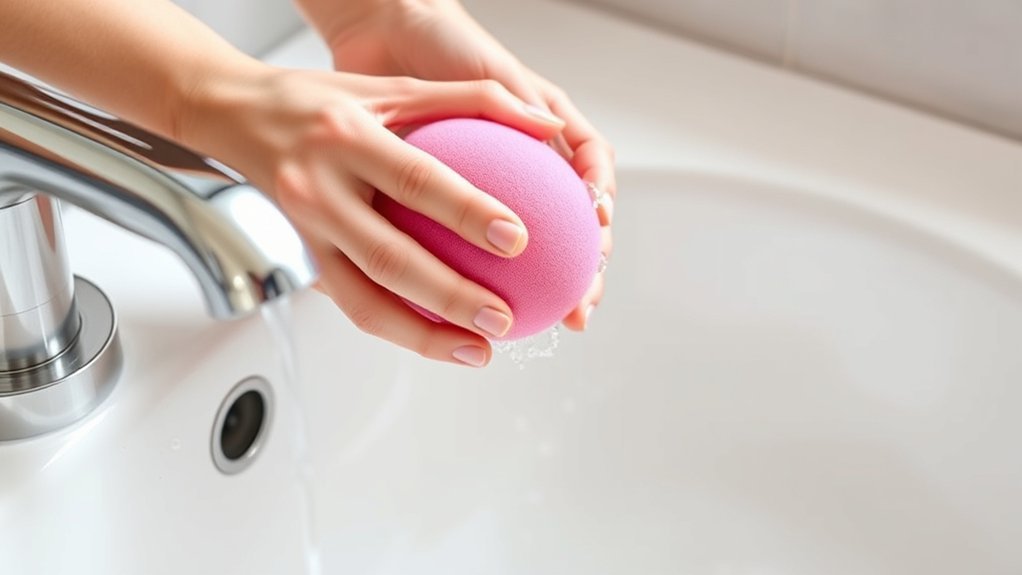
Start by thoroughly wetting your Beauty Blender with lukewarm water to loosen makeup and impurities trapped inside. Next, apply a gentle cleanser, working it into a lather by pressing and squeezing the sponge. Rinse repeatedly until the water runs clear.
Practicing proper cleaning ethics means you should clean your sponge regularly to prevent bacteria buildup. After cleaning, ensure proper product storage by placing your Beauty Blender in a breathable container, avoiding damp, enclosed spaces.
| Step | Action | Tip |
|---|---|---|
| 1 | Wet thoroughly | Use lukewarm water |
| 2 | Apply cleanser | Choose gentle, non-toxic options |
| 3 | Lather and squeeze | Avoid harsh scrubbing |
| 4 | Rinse until clear | Check for residue |
| 5 | Dry and store | Use breathable container |
Which Household Products Can You Use to Clean Your Beauty Blender?
Wondering which household products can effectively clean your Beauty Blender without causing damage? You can rely on gentle, fragrance-free options like mild liquid dish soap or baby shampoo. These products break down makeup residues without harsh chemicals that might compromise the sponge’s integrity or irritate your skin.
Avoid antibacterial soaps with strong fragrances, as they can cause sensitivity and diminish the anti-aging benefits of your skincare routine. Another effective household item is olive oil combined with soap; it loosens stubborn stains while maintaining softness.
Always rinse thoroughly to remove any residue, ensuring your Beauty Blender stays clean and safe for daily use. Using these common, skin-friendly products preserves your blender’s texture and supports your overall skincare goals.
How Often to Clean and Replace Your Beauty Blender
You should clean your Beauty Blender after every use to prevent bacteria buildup and maintain its performance. Replacing it every three months ensures optimal hygiene and application results.
Let’s review the best cleaning frequency and when it’s time to get a new sponge.
Cleaning Frequency Tips
Regularly cleaning your Beauty Blender is essential to maintain its performance and hygiene. To ensure optimal results, focus on an effective cleaning frequency: ideally, wash your sponge after every use. This prevents makeup buildup, bacteria growth, and skin irritation.
When you clean consistently, your Beauty Blender stays soft and functional, extending its useful life.
In addition to daily cleaning, keep the replacement timeline in mind. Even with proper care, Beauty Blenders degrade over time and should be replaced every three months.
Monitoring your cleaning frequency helps you recognize when the sponge no longer performs well or develops tears. By adhering to these cleaning frequency tips, you protect your skin and maximize the lifespan of your Beauty Blender without compromising your makeup routine.
Replacement Timeline Guide
How often should you replace your Beauty Blender to maintain both hygiene and performance? Experts recommend swapping it out every three months. Over time, your sponge accumulates bacteria, even with regular cleaning, which can lead to skin irritation.
To extend its lifespan, follow proper storage tips: always let it dry completely in a well-ventilated area and avoid sealing it in airtight containers, which foster bacterial growth and unpleasant odors.
Speaking of odors, scent considerations are important. If your Beauty Blender develops a persistent sour smell despite cleaning, it’s a clear sign it’s time to replace it.
Staying consistent with both cleaning and timely replacement ensures you maintain flawless application and protect your skin’s health effectively.
How to Dry Your Beauty Blender for Best Results
Proper air-drying techniques play a vital role in maintaining your Beauty Blender’s shape and hygiene. After cleaning, avoid using heat or closed containers, which can encourage mold and bacteria growth.
Contrary to some skincare myths, squeezing out excess water gently and letting your sponge dry in a well-ventilated area preserves its integrity and prevents damage. Using proper drying methods also extends the life of your makeup tools, ensuring optimal performance.
| Drying Method | Pros | Cons |
|---|---|---|
| Air drying on rack | Maintains shape, hygienic | Takes longer |
| Hanging by string | Good airflow, quick dry | Requires setup |
| Laying flat | Easy, no setup needed | Slower drying, less airflow |
Choose a method that fits your routine while prioritizing cleanliness.
How to Remove Stubborn Stains From Your Beauty Blender
When stubborn stains cling to your Beauty Blender, using the right cleaning products and techniques is essential to restore its appearance. You’ll want to apply effective stain removal methods that target deep-set makeup without damaging the sponge.
Let’s explore proven tips for deep cleaning and the best products to tackle those persistent marks.
Effective Stain Removal Techniques
Why do some stains cling stubbornly to your Beauty Blender despite regular cleaning? Often, glossy textures in makeup products create a barrier that standard rinsing can’t break down, leading to persistent discoloration.
To tackle this, soak your sponge in warm water mixed with a gentle cleanser to loosen the pigment. Then, use a targeted, circular pressing motion to work deep within the porous surface, focusing on stained areas. This method prevents damage while effectively lifting residue.
For scent retention, rinse thoroughly to avoid leftover product buildup that can trap odors. Repeat the process if necessary, but avoid harsh scrubbing to maintain your Beauty Blender’s integrity. Consistent, careful technique ensures your sponge stays fresh, stain-free, and ready for flawless application.
Best Cleaning Products
Which cleaning products deliver the best results for removing stubborn stains from your Beauty Blender? Choosing the right cleaning tools and products is crucial for effective, gentle cleansing. Here are three top options:
- Solid Beauty Blender Cleanser – Specifically designed for sponges, it targets stubborn stains without harsh chemicals.
- Fragrance free gentle liquid soaps – These avoid irritation and effectively dissolve makeup residue, preserving your sponge’s integrity.
- Micellar water-based cleansers – Ideal for sensitive skin, they lift stains efficiently while being mild and fragrance free.
Using these products with proper cleaning tools like soft brushes or your hands ensures thorough stain removal. Avoid abrasive cleansers that can damage your Beauty Blender. Stick to fragrance free products to prevent allergic reactions and maintain the sponge’s longevity.
Deep Cleaning Tips
How do you tackle those stubborn stains that just won’t budge on your Beauty Blender? Start by gathering essential cleaning gear: a gentle cleanser, warm water, and a soft brush. Apply the cleanser directly to the sponge and work it in with circular motions, focusing on stained areas.
For deeper stains, soak the Beauty Blender in warm soapy water for 10-15 minutes before scrubbing again. Avoid harsh chemicals to maintain the sponge’s integrity. After cleaning, rinse thoroughly until water runs clear.
To ensure your sponge is free from any overpowering scent, perform fragrance testing by smelling it after rinsing; this confirms all residues are removed. Following these steps regularly keeps your Beauty Blender hygienic and extends its lifespan effectively.
Common Mistakes to Avoid When Cleaning Your Beauty Blender
When cleaning your Beauty Blender, what common pitfalls should you watch out for to maintain its quality and hygiene? Avoiding these mistakes ensures your sponge stays effective and lasts longer.
- Using harsh detergents or soaps unrelated to cosmetic cleaning can degrade the sponge’s material. Stick to gentle, Beauty Blender-approved cleansers.
- Rushing the process or skipping thorough rinsing leads to residue buildup, which harbors bacteria and affects makeup application.
- Storing your Beauty Blender while damp is an irrelevant concept; moisture encourages mold growth. Always let it dry completely in a well-ventilated area.
Frequently Asked Questions
Can I Use a Beauty Blender on Other Makeup Products?
Yes, you can use a beauty blender on other makeup products, but follow cleaning tips diligently to avoid cross contamination risks.
Clean it thoroughly between uses to maintain hygiene and prevent bacteria buildup, ensuring flawless application every time.
Is It Safe to Share My Beauty Blender With Others?
No, you shouldn’t share your Beauty Blender. Sharing compromises hygiene and product safety, increasing the risk of bacterial transfer and skin infections.
Always use your own sponge to maintain cleanliness and protect your skin’s health.
How Do I Store My Beauty Blender Between Uses?
You should store your Beauty Blender in a breathable container to prevent mold growth. Avoid airtight storage; consider silicone cases or mesh bags as material alternatives that allow airflow and maintain the sponge’s integrity between uses.
Can Beauty Blenders Cause Skin Irritation or Acne?
Yes, beauty blenders can cause irritation and acne if not cleaned properly, as bacteria buildup clogs pores and triggers inflammation. You should regularly wash and dry them to prevent these acne causes and protect your skin’s health.
Are There Vegan or Cruelty-Free Beauty Blenders Available?
Yes, you’ll find plenty of vegan options and cruelty-free brands offering beauty blenders. Look for certified labels and ingredient lists to ensure ethical sourcing, helping you maintain your routine without compromising your values or skin health.
Conclusion
Cleaning your Beauty Blender might seem time-consuming, but it’s essential for flawless makeup and skin health. Don’t worry—using simple household items and a few minutes after each use keeps it fresh and bacteria-free.
Skipping this step risks breakouts and uneven application, so make it a quick habit. With proper care, your sponge lasts about three months, saving you money and ensuring your makeup looks its best every time.
Regular cleaning is key to maintaining your Beauty Blender’s performance and hygiene. Taking these small steps will help you get the most out of your Beauty Blender.