How Do You Wash Beauty Blender
You might not realize that failing to wash your Beauty Blender regularly can lead to clogged pores and skin irritation, even if it looks clean. Proper cleansing removes makeup residue, oils, and bacteria that build up with use, ensuring your skin stays healthy and your application flawless.
Understanding the best methods and products to clean your Beauty Blender not only extends its life but also protects your complexion. It’s worth mastering the right technique before your next makeup session to keep both your sponge and skin in top condition.
Key Takeaways
- Wet the Beauty Blender with warm water before applying a gentle, fragrance-free cleanser.
- Massage the cleanser into the sponge, focusing on stained or heavily used areas.
- Rinse thoroughly by squeezing the sponge until the water runs clear and no residue remains.
- Avoid twisting the sponge; instead, gently squeeze out excess water to preserve its texture.
- Air-dry the sponge in a well-ventilated area away from direct sunlight before storing.
Why You Should Wash Your Beauty Blender Regularly
Why should you wash your Beauty Blender regularly? The concept evolution of makeup sponges has highlighted hygiene as a critical factor in maintaining flawless skin and makeup application. When you skip cleaning, bacteria and old product buildup accumulate, leading to breakouts and uneven coverage.
Regular washing preserves the sponge’s porous texture, ensuring it blends makeup seamlessly. It also extends the lifespan of your Beauty Blender, positively affecting your budget impact by reducing the frequency of replacement.
Ignoring cleaning not only compromises skin health but also forces you to spend more on new sponges. Staying on top of this simple routine aligns with current beauty trends prioritizing clean, sustainable tools and supports your overall skincare and makeup investment.
Best Supplies for Cleaning Your Beauty Blender
Although you can clean your Beauty Blender with basic household items, using the right supplies guarantees a deeper cleanse and preserves the sponge’s delicate texture. To maintain your sponge’s integrity while thoroughly removing makeup residue, it’s essential to choose effective cleaning tools designed for porous materials or consider a silicone alternative, which requires different care.
Here are four top supplies to enhance your cleaning routine:
- Beauty Blender Solid Cleanser: Specifically formulated to dissolve makeup without harsh chemicals.
- Gentle Liquid Soap: A mild, fragrance-free soap protects the sponge’s softness.
- Silicone Cleaning Mat: Offers textured surfaces that help break down buildup when used with your sponge or silicone alternative.
- Antibacterial Spray: For quick sanitizing between deep cleans, especially useful for silicone alternatives.
Using these supplies ensures a thorough, sponge-safe cleaning every time.
How to Wash Your Beauty Blender by Hand
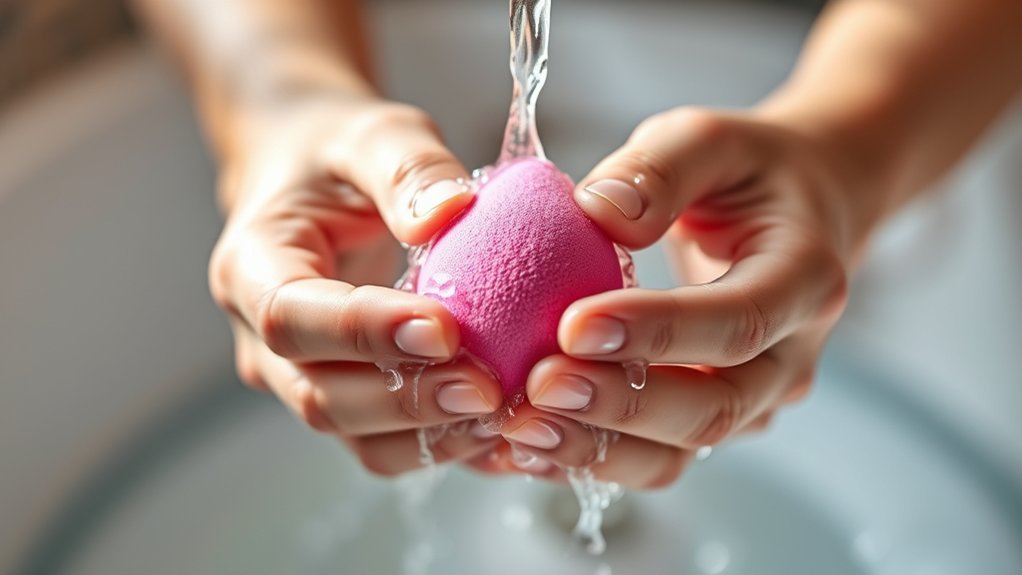
To get the most out of your chosen cleaning supplies, washing your Beauty Blender by hand offers precise control over pressure and thoroughness. Start by wetting your sponge with warm water, then apply a gentle cleanser. Work the cleanser into the sponge with your fingertips, focusing on stained areas.
Rinse thoroughly, squeezing repeatedly until water runs clear. This step is essential for how to sanitize effectively and maintain ideal makeup sponge care.
| Step | Key Tips |
|---|---|
| Wet & Apply Cleanser | Use warm water; gentle cleanser |
| Massage & Clean | Focus on stained areas; avoid harsh scrubbing |
| Rinse & Squeeze | Clear water rinse; ensure no residue |
Hand washing preserves the sponge’s integrity while ensuring deep cleaning.
Using a Beauty Blender Cleanser for Deep Cleaning
When should you turn to a specialized Beauty Blender cleanser for deep cleaning? Opt for these cleansers when your cleaning blender routine no longer removes stubborn makeup or oils effectively. Specialized cleansers are formulated to break down pigments and bacteria without damaging the sponge’s delicate texture. Keep in mind fragrance considerations. Choose fragrance-free or lightly scented options if you have sensitive skin or prefer a neutral scent.
Here are four signs you need a deep clean using a Beauty Blender cleanser:
- Residue buildup persists after regular washing.
- Sponge feels greasy or sticky to the touch.
- You notice discoloration that doesn’t fade.
- Your skin reacts after using the sponge, indicating bacteria buildup.
Using a targeted cleanser ensures a hygienic, long-lasting cleaning blender experience.
How to Dry and Store Your Beauty Blender Safely
After thoroughly cleaning your Beauty Blender, you’ll want to dry it properly to prevent bacterial growth and maintain its shape. Air-drying in a well-ventilated area, away from direct sunlight, is your best bet to keep it fresh and durable.
When it’s dry, store your sponge in a breathable container to avoid trapping moisture and prolong its lifespan.
Proper Drying Techniques
Letting your Beauty Blender dry properly is essential to maintaining its shape and preventing bacterial growth. To keep your sponge looking flawless and free from a never seen blemish, follow these expert drying techniques:
- Gently squeeze out excess water without twisting to avoid damaging the sponge’s structure.
- Pat dry with a clean, fragrance free towel to remove surface moisture.
- Place your Beauty Blender in an open, well-ventilated area away from direct sunlight and heat sources to ensure thorough air drying.
- Avoid sealing it in airtight containers while damp, as trapped moisture promotes bacteria growth and mildew.
Safe Storage Tips
Where should you store your Beauty Blender to keep it clean and long-lasting? After drying it thoroughly, place your sponge in a breathable container designed for makeup tools. Avoid airtight plastic bags or containers that trap moisture, as they encourage bacteria growth.
Opt for fragrance-free storage solutions to prevent irritation and maintain the sponge’s material integrity. Incorporate this into your regular care routine to ensure your Beauty Blender stays hygienic and effective.
Keeping it in a well-ventilated, clean space reduces the risk of mold and prolongs its lifespan. Remember, consistent care isn’t just about washing but also about how you store your sponge post-cleaning. Safe storage is a essential step in preserving your Beauty Blender’s performance and your skin’s health.
When to Replace Your Beauty Blender for Healthy Skin
You should replace your Beauty Blender as soon as you notice signs of wear like tears or loss of bounce, since these can harbor bacteria and affect your skin’s health.
Maintaining hygiene means swapping it out regularly to prevent breakouts and irritation caused by buildup. Experts recommend changing your sponge every three months, but if you use it daily or notice damage sooner, it’s best to upgrade earlier.
Signs of Wear
How can you tell when it’s time to retire your Beauty Blender? Just like wearable accessories or makeup brushes, your sponge shows clear signs of wear that signal replacement. Using a compromised Beauty Blender can affect your makeup application and skin health.
Here are four key signs to watch for:
1. Tears or Cracks
These harbor bacteria and reduce blending efficiency.
2. Loss of Bounce
A sponge that doesn’t spring back won’t provide smooth, even coverage.
3. Persistent Stains or Odors
Indicate buildup that washing can’t fix.
4. Texture Changes
When the sponge feels rough or crumbly, it’s breaking down.
Recognizing these signs ensures you maintain flawless makeup application and protect your skin from irritation or breakouts.
Hygiene and Skin Health
Regularly replacing your Beauty Blender plays an essential role in maintaining both hygiene and skin health. Over time, these sponges harbor bacteria, dead skin cells, and makeup residue that disrupt your skin flora balance, potentially leading to breakouts or irritation.
Continued use without replacement increases allergen exposure, which can exacerbate sensitivities or trigger allergic reactions, especially if you have compromised skin barriers. Even with diligent washing, micro-tears in the sponge can trap contaminants, making thorough cleansing less effective.
To protect your skin’s natural microbiome and reduce the risk of inflammation, it’s vital to retire your Beauty Blender before it degrades visibly or starts retaining odors. This proactive approach supports a cleaner application tool and healthier skin overall.
Replacement Frequency Guidelines
When should you replace your Beauty Blender to ensure optimal skin health? Understanding the replacement lifecycle is crucial, as prolonged use can compromise material safety and harbor bacteria. Typically, experts recommend swapping your sponge every 3 months, but this depends on usage and maintenance.
Consider these guidelines for timely replacement:
- Material degradation: Noticeable tears or changes in texture signal compromised integrity.
- Persistent odors: Lingering smells indicate bacterial buildup despite cleaning.
- Skin reactions: New breakouts or irritation may stem from an old sponge.
- Frequent use: Daily users should replace more often to maintain hygiene.
Frequently Asked Questions
Can I Wash My Beauty Blender in the Dishwasher?
You shouldn’t wash your Beauty Blender in the dishwasher; heat and harsh detergents can damage it. Instead, use antimicrobial soaps with gentle hand cleaning for effective, safe maintenance that preserves its texture and longevity.
Is It Safe to Use Antibacterial Soap on My Beauty Blender?
You shouldn’t use antibacterial soap on your beauty blender, as it can degrade the sponge. Instead, try antibacterial alternatives like gentle cleansers or oil-based removers for effective makeup stain removal without damaging your tool.
How Often Should I Wash My Beauty Blender if I Use It Daily?
You should wash your beauty blender daily as part of your daily routine to prevent bacteria buildup. Proper makeup removal after each use keeps it clean, prolongs its life, and guarantees flawless, hygienic application every time.
Can I Sanitize My Beauty Blender With Rubbing Alcohol?
You can sanitize your Beauty Blender with rubbing alcohol, but be cautious. Alcohol cautions include potential sponge damage. Avoid sanitization myths; thorough washing with gentle soap and air drying is usually safer and more effective for longevity.
Will Washing My Beauty Blender Remove All Makeup Stains Completely?
You know what they say: “Rome wasn’t built in a day.” While washing improves removal techniques, stubborn makeup stains might linger, affecting color longevity.
Regular deep cleaning, using proper methods, ensures your sponge stays fresh and vibrant longer.
Conclusion
Keeping your Beauty Blender clean is like giving your skin a fresh start every time you apply makeup. Washing it regularly with gentle cleansers helps remove dirt, oil, and makeup residue. This prevents bacteria buildup that can cause breakouts and dullness.
Drying your Beauty Blender properly is just as important to maintain its shape and hygiene. Remember, a well-maintained sponge not only boosts your makeup’s finish but also safeguards your skin’s health.
Treat your Beauty Blender like a trusted tool—clean, care, and replace it when needed. Proper care of your Beauty Blender ensures flawless, glowing skin every time you use it.