How to Clean the Toaster
You might not realize that leftover crumbs in your toaster can become a fire hazard if not cleaned regularly. Cleaning the toaster is an important task to ensure safety and maintain its functionality.
To clean your toaster effectively, you need to start by unplugging it and allowing it to cool completely, a crucial safety step many overlook.
The process involves carefully removing the crumb tray and using specific tools to avoid damaging delicate components. Understanding these details will help you maintain your toaster’s performance and longevity.
Regular cleaning not only prevents hazards but also keeps your appliance working efficiently.
Key Takeaways
- Unplug the toaster and ensure it is cool before starting any cleaning process for safety.
- Remove and empty the crumb tray regularly to prevent buildup and fire hazards.
- Use a soft-bristle brush or old toothbrush to dislodge crumbs from narrow slots and interior surfaces.
- Clean the exterior with a damp microfiber cloth and mild detergent, avoiding abrasive pads and harsh chemicals.
- Apply natural cleaners like lemon juice spray or baking soda paste inside, avoiding heating elements, then wipe thoroughly.
Essential Supplies to Clean Your Toaster
What tools will you need to clean your toaster effectively? Start with a soft-bristle brush to dislodge crumbs from narrow slots without damaging the heating elements. A microfiber cloth is essential for wiping exterior surfaces, while cotton swabs reach tight corners.
Use a plastic or wooden scraper to avoid scratching the interior. For budget friendly tips, repurpose an old toothbrush for scrubbing and vinegar diluted with water as a natural cleaning solution. Creative uses include employing a lint-free cloth dampened with baking soda paste to remove stubborn stains.
Avoid harsh chemicals that may damage your toaster’s finish or internal parts. Having these precise tools ready ensures thorough cleaning while maintaining your appliance’s longevity and functionality.
Unplug Your Toaster Safely Before Cleaning
Before you begin cleaning with your chosen tools, ensure the toaster is completely disconnected from any power source. Prioritize unplugging safety by firmly grasping the plug, never the cord, when removing it from the outlet to prevent damage.
Confirm the toaster is cool to the touch to avoid burns. Locate the crumb tray, usually positioned at the bottom or side, but don’t remove it yet; this is for the next step.
Inspect the cord for any frays or damage before unplugging, as compromised wiring poses an electrical hazard. By following these precise steps, you minimize the risk of electric shock or injury during cleaning.
Always allow sufficient time for residual heat to dissipate before handling internal components.
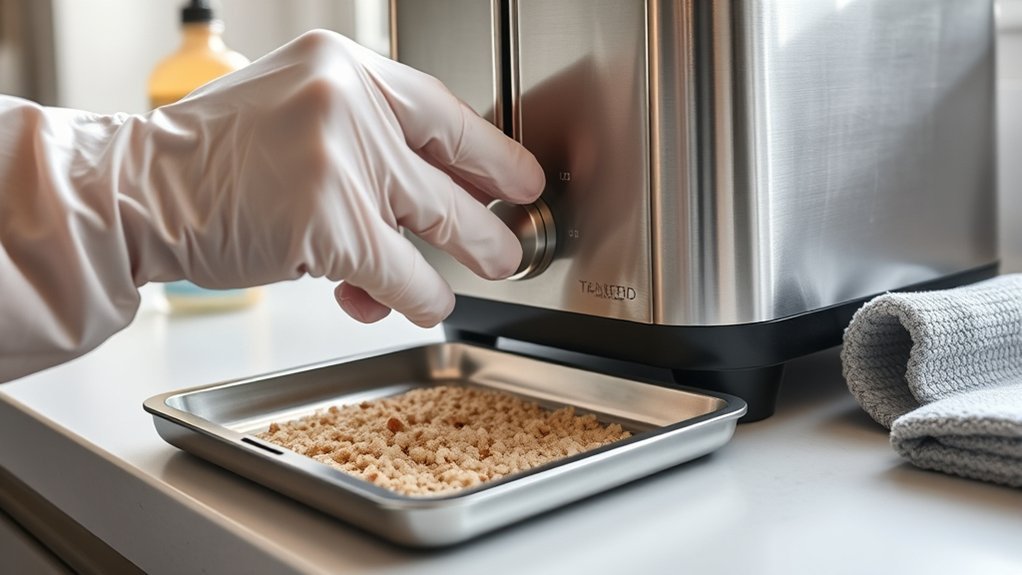
Remove and Empty the Toaster Crumb Tray
First, locate the crumb tray, usually positioned at the bottom or side of your toaster. Gently slide the tray out to avoid spilling crumbs inside the appliance.
Then, empty the tray into a trash bin, ensuring all debris is fully removed before reinserting it.
Locate The Crumb Tray
Where exactly is the crumb tray located on your toaster? Understanding the toaster crumb tray’s functional design is essential for effective cleaning. Most models integrate the tray at the base or rear, allowing easy access without disassembling the unit.
To precisely locate the crumb tray:
- Inspect the bottom side of the toaster for a thin, pull-out panel.
- Check the rear lower section for a removable sliding tray.
- Look for a slight gap or handle-like indentation indicating the tray’s edge.
This placement reflects a functional design prioritizing user convenience while containing crumbs efficiently. Identifying the exact position ensures you can remove and empty it regularly, maintaining optimal toaster performance and hygiene.
Safely Remove The Tray
How do you safely remove the crumb tray without damaging your toaster or creating a mess? First, ensure the toaster is unplugged and completely cooled to avoid burns or electrical hazards.
Locate the crumb tray, typically found at the base or rear of the toaster, often sliding out smoothly from beneath the metal exterior. Grip the tray firmly but gently, and pull it straight out to prevent dislodging crumbs inside the toaster. Avoid tilting or shaking the toaster to keep debris contained.
If the tray sticks, wiggle it slightly without forcing. Once removed, hold the tray over a trash receptacle to empty crumbs carefully. Inspect the tray slot for residual debris, wiping with a dry cloth if necessary, before reinserting the crumb tray securely into the metal exterior housing.
Properly Dispose Of Crumbs
After safely removing the crumb tray, focus on disposing of the accumulated crumbs to maintain your toaster’s performance and hygiene. Proper toaster crumb disposal prevents buildup that can cause odors or even fire hazards. Follow these steps for effective crumb tray maintenance:
- Gently tap the tray over a trash bin to dislodge loose crumbs.
- Use a soft brush or cloth to remove residual particles, ensuring no debris remains trapped.
- If necessary, rinse the tray with warm, soapy water, then dry it thoroughly before reinserting to avoid moisture damage.
Clean the Toaster’s Exterior Without Damage
A careful approach is essential when cleaning the toaster’s exterior to prevent damage to its surface and internal components. Prioritize safety handling by unplugging the toaster and allowing it to cool completely before cleaning.
Always unplug and cool your toaster fully before cleaning to protect its surface and internal parts.
Select tools that minimize risk: use a soft microfiber cloth and a mild detergent solution to avoid scratches and corrosion. Avoid abrasive pads or harsh chemicals, which can degrade finishes and seals.
Lightly dampen the cloth, never soak it, to prevent moisture from entering vents or electrical parts. Wipe in gentle, circular motions, focusing on stained or greasy areas.
For stubborn grime, apply detergent sparingly, then immediately wipe with a clean, damp cloth to remove residues. This method ensures optimal cleanliness without compromising your toaster’s integrity or functionality.
Clean the Toaster’s Interior Using Natural Ingredients
You’ll start by applying a baking soda paste to gently scrub away crumbs and stains inside the toaster.
Next, use a vinegar spray to disinfect and dissolve residue without harsh chemicals.
Finally, wipe the interior with lemon juice to neutralize odors and leave a fresh scent.
Baking Soda Cleaning Method
How exactly can you remove stubborn crumbs and stains from your toaster’s interior without harsh chemicals? The baking soda cleaning method offers a precise, natural solution that respects the toaster design and crumb tray materials. Here’s how to proceed:
- Mix baking soda with water to form a thick paste, ensuring the consistency adheres well to surfaces without dripping into electrical components.
- Apply the paste carefully to the interior surfaces, focusing on areas with baked-on residue, avoiding direct contact with heating elements.
- Let the paste sit for 10-15 minutes to break down grime, then gently scrub with a soft brush or cloth, mindful of crumb tray materials to prevent damage.
Finally, wipe away residue with a damp cloth and dry thoroughly before reassembling. This method maintains your toaster’s integrity while effectively cleaning.
Vinegar Spray Application
The vinegar spray application harnesses acetic acid’s natural cleaning power to dissolve grease and mineral deposits inside your toaster without risking damage to delicate components. To ensure toaster safety, first unplug the device and remove all detachable parts.
Prepare a 50/50 solution of distilled white vinegar and water in a spray bottle. Lightly mist the interior surfaces, avoiding electrical elements. Let the solution sit for 5–7 minutes to break down residues effectively.
Use a soft brush or cloth to gently scrub areas with buildup, focusing on crumb trays and slots. The vinegar’s acidity also mitigates odors, preserving your toaster’s sourdough versatility by preventing flavor transfer.
After cleaning, wipe surfaces with a damp cloth and allow thorough drying before reassembling and plugging in your toaster. This method preserves function while ensuring hygienic maintenance.
Lemon Juice Deodorizing
Why choose lemon juice for deodorizing your toaster’s interior? Lemon juice is a natural, eco friendly solution that effectively neutralizes odors without harsh chemicals. Its acidic properties break down residual grease and burnt particles, enhancing your toaster’s hygiene.
Incorporating lemon juice aligns with new tech trends promoting sustainable appliance care. To deodorize efficiently:
- Mix equal parts lemon juice and water in a spray bottle, ensuring precise dilution for safety.
- Spray the interior surfaces lightly, avoiding electrical components, and let it sit for 10 minutes to penetrate grime.
- Wipe thoroughly with a damp microfiber cloth to remove loosened debris and excess moisture.
This method preserves your toaster’s function while minimizing environmental impact, making lemon juice an optimal choice for natural, technical maintenance.
How Often to Clean Your Toaster for Best Results
When should you clean your toaster to maintain best performance and safety? You should clean your toaster regularly based on toaster lint accumulation and your user habits. Frequent use generates more crumbs, increasing fire risk and affecting heating efficiency.
Light users can clean monthly; heavy users should clean weekly to prevent buildup.
| User Habits | Toaster Lint Level | Recommended Cleaning Frequency |
|---|---|---|
| Occasional Use | Low | Monthly |
| Moderate Use | Moderate | Biweekly |
| Daily Use | High | Weekly |
| Heavy Use with Sticky Foods | Very High | Twice Weekly |
| Rare Use | Minimal | Every 2 Months |
Adjust cleaning intervals based on visible crumb buildup and toaster performance to ensure safety and optimal function.
Why Keeping Your Toaster Clean Matters
Regular cleaning schedules help prevent crumb buildup, but understanding the impact of accumulated debris on your toaster’s function emphasizes the importance of maintaining cleanliness. Neglecting crumb disposal compromises toaster safety and operational efficiency.
You should keep your toaster clean to:
- Prevent Fire Hazards: Crumbs trapped inside can ignite, posing serious toaster safety risks.
- Ensure Consistent Heating: Debris disrupts heat distribution, leading to uneven toasting.
- Prolong Appliance Lifespan: Regular removal of crumbs reduces wear on internal components, maintaining performance.
Troubleshooting Common Toaster Cleaning Issues
Cleaning your toaster can sometimes present challenges that interfere with effective crumb removal and appliance maintenance. If crumbs remain stuck, unplug the toaster and use a soft brush or compressed air to dislodge particles without damaging heating elements.
Avoid water contact to maintain toaster safety and prevent electrical hazards. For stubborn stains inside, apply a small amount of isopropyl alcohol on a cloth, ensuring no liquid seeps into the toaster’s internal components.
If the crumb tray sticks or won’t slide out, inspect for debris blocking the tracks and gently clear it using a toothpick or soft brush. Adopting a maintenance mindset by addressing these issues promptly prevents buildup and preserves the toaster’s functionality while ensuring safe, efficient cleaning.
Tips to Keep Your Toaster Cleaner Longer
To keep your toaster cleaner longer, focus on minimizing crumb buildup and preventing residue accumulation from the start. Maintaining strict toaster safety and kitchen hygiene protocols will extend your appliance’s lifespan and reduce fire hazards.
- Use a Crumb Tray Regularly: Empty the crumb tray after each use to prevent debris from igniting, ensuring safe operation and consistent performance.
- Avoid Overfilling Slots: Insert bread slices properly to prevent crumbs from falling inside, which can cause buildup and affect heating elements.
- Wipe Exterior Surfaces: Clean the toaster’s exterior with a damp cloth frequently to remove grease and spills, maintaining kitchen hygiene and reducing contamination risks.
Implement these precise habits to keep your toaster functioning optimally and your kitchen environment safe and clean.
Frequently Asked Questions
Can I Put My Toaster in the Dishwasher?
You shouldn’t put your toaster in the dishwasher because it can damage electrical components. Instead, use specific cleaning methods like unplugging, removing crumbs, and wiping the exterior to guarantee proper appliance maintenance and safety.
Is It Safe to Use Metal Utensils Inside the Toaster?
Don’t poke the bear. Using metal utensils inside the toaster risks electrical shock and damage. For toaster safety, stick to cleaning techniques like unplugging first and using wooden or plastic tools to avoid short circuits and burns.
How Do I Remove Burnt Plastic From My Toaster?
You’ll want to unplug the toaster, let the burning plastics cool, then gently scrape off residue with a plastic scraper. Use oven cleaning gloves and a mild oven cleaning solution for stubborn spots, avoiding metal tools to prevent damage.
Can Vinegar Damage the Toaster’s Heating Elements?
Like a cautious dance, vinegar safety demands you avoid direct contact with heating elements to prevent corrosion. You shouldn’t apply vinegar directly on the heating element; instead, focus on external surfaces for effective heating element care.
What Should I Do if My Toaster Sparks When Plugged In?
If your toaster sparks when plugged in, immediately unplug it to ensure electrical safety. Inspect for debris or damaged wiring. Avoid using it until a qualified technician performs a thorough electrical safety check and necessary repairs.
Conclusion
Now that you know how to clean your toaster safely and effectively, why settle for less when it comes to maintenance? Regularly unplugging, emptying crumbs, and gently wiping both interior and exterior prevents buildup and extends your toaster’s lifespan.
Following these precise steps not only ensures optimal performance but also reduces fire risks. With consistent care, your toaster will stay in peak condition—making every breakfast routine smoother and safer.
Isn’t that worth the effort? Proper toaster cleaning is essential for keeping your appliance functioning well and safe to use.