How to Cook Toast Without a Toaster
If you don’t have a toaster, you can still cook toast without a toaster by using common kitchen tools and simple techniques. Start by selecting bread that’s fresh but slightly dry to ensure even browning.
Whether you use your oven, stovetop, or even a grill, controlling the heat and timing is key to developing a rich, amber crust without burning.
Let’s explore the best methods to get consistent, delicious toast every time.
Key Takeaways
- Preheat a pan or oven to medium heat (350°F) and toast bread 2-3 minutes per side for even browning without burning.
- Use sturdy bread slices about ¾-inch thick for balanced crispness and a tender interior when toasting without a toaster.
- Flip bread gently every 30 seconds on an open flame or grill to ensure uniform golden crust and prevent charring.
- Cover microwave-toasted bread with a paper towel and toast at medium power in short intervals to avoid sogginess.
- Apply butter or toppings promptly while toast is warm to enhance flavor and achieve better melting.
Tips for Perfect Toast Without a Toaster
How can you achieve perfectly toasted bread without a toaster? Start by guaranteeing your bread is fresh but slightly dry; proper bread storage is essential to avoid sogginess. Keep your bread in a paper bag or loosely wrapped in a cloth to maintain just the right moisture level.
When toasting on a stovetop or pan, preheat it over medium heat to avoid burning. Use toasting etiquette by flipping the bread gently with tongs or a spatula to guarantee even browning on both sides. Watch closely to prevent charring, as timing is key—about 2-3 minutes per side.
Adjust heat as needed for your bread type. These steps help you create perfectly crisp, golden toast without any specialized equipment.
Choosing the Best Bread for Toasting Without a Toaster
Choose bread with the right texture and thickness to ensure even toasting without a toaster. Consider flavor profiles that will complement your toppings and enhance the overall taste.
Always pick fresh bread with a good shelf life to achieve the best results and avoid sogginess.
Bread Texture And Thickness
Why does the texture and thickness of your bread matter when toasting without a toaster? Because these factors directly affect how evenly your bread toasts and how well it holds up during cooking.
Start by selecting bread with a sturdy bread crust; it protects the crumb structure from becoming soggy or burning too quickly. Avoid ultra-thin slices, which can scorch before warming through, and overly thick slices, which may toast unevenly inside.
Aim for slices about ¾-inch thick to balance a crunchy exterior with a tender interior. The crumb structure should be tight enough to prevent excessive moisture loss but open enough to crisp nicely.
Paying attention to these details ensures your toast develops a perfect golden-brown texture and a satisfying bite without specialized equipment.
Flavor Profiles To Consider
What flavors do you want to highlight when you toast bread without a toaster? Start by selecting breads that complement your desired flavor pairings. For a nutty, rich taste, choose whole grain or multigrain bread; their deep aroma notes intensify when toasted over a pan or open flame.
If you prefer a mild, slightly sweet profile, white or brioche bread works well, offering delicate aroma notes that enhance butter or jam. Consider rye or sourdough for tangy, robust flavors that pair excellently with savory toppings.
Toasting enhances these aroma notes, so match your bread to your toppings thoughtfully. By focusing on flavor pairings and the natural aroma notes released through toasting, you’ll create a perfectly balanced, flavorful toast every time, no toaster needed.
Freshness And Shelf Life
When preparing to toast bread without a toaster, you’ll often find that freshness plays a vital role in the final texture and flavor. Fresh bread resists dryness and toast unevenness caused by freshness decay. Understanding shelf life helps you pick bread that maintains optimal quality for toasting.
| Bread Type | Typical Shelf Life |
|---|---|
| Freshly Baked | 1-2 days (high freshness) |
| Packaged Bread | 5-7 days (moderate decay) |
| Artisan Bread | 2-3 days (slow decay) |
Choose bread near the start of its shelf life to avoid stale textures, which hinder crispness when cooking without a toaster. Proper storage slows freshness decay, ensuring your toast achieves that perfect balance of crunch and softness.
How to Make Toast Without a Toaster Using Your Oven
Wondering how to get perfectly toasted bread without a toaster? Your oven provides an excellent alternative. Preheat it to 350°F (175°C). Place bread slices directly on the oven rack or on a baking sheet for easier cleanup.
The bread science here is simple: the oven’s dry heat evenly evaporates moisture, creating that ideal crispy texture and golden color. Toast for 5–7 minutes, flipping halfway through to ensure both sides brown evenly. Keep a close eye to avoid burning.
Once toasted, transfer the bread to a plate. For optimal flavor, apply butter pairings immediately while the toast is warm; this allows the butter to melt and seep into the crumb, enhancing taste and texture. Using your oven gives you control over toast color and crunch without needing a dedicated appliance.
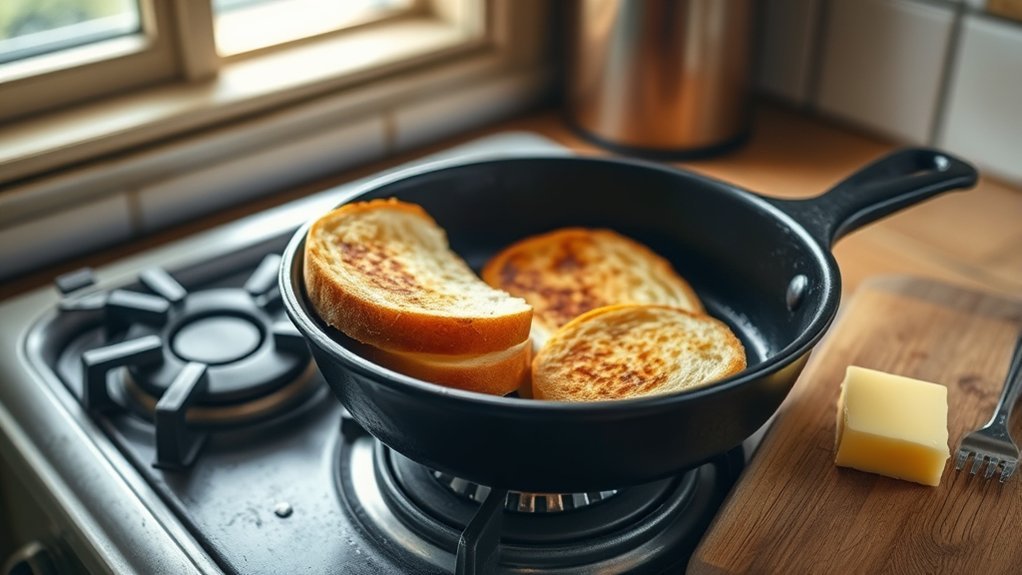
How to Toast Bread Without a Toaster on the Stovetop
If you don’t have access to an oven, you can easily toast bread on the stovetop using a skillet or frying pan. Start by preheating the pan over medium heat.
Check your bread’s crust thickness; thicker crusts will need more time to toast evenly. Before placing the bread in the pan, consider your bread storage method. Stale or dry bread will toast faster but may burn if unattended.
Lay the slices flat in the dry pan without oil or butter for a classic toast. Cook each side for 2-3 minutes, flipping when golden brown. Adjust the heat to avoid burning.
Keep a close eye on the bread, as stovetop toasting can be quicker than oven methods. Once toasted, remove and serve immediately for best texture.
How to Quickly Toast Bread Without a Toaster in the Microwave
To quickly toast bread in the microwave, start by placing a single slice on a microwave-safe plate and cover it with a paper towel to absorb moisture. Set your microwave to medium power to prevent overheating and ensure even toasting.
Toasting timing is crucial; start with 30 seconds, then check the bread’s texture. If it’s not crisp enough, continue microwaving in 10- to 15-second intervals, monitoring closely to avoid burning. Remember, microwaves vary, so adjust timing accordingly.
For microwave safety, never use metal or foil, and ensure the plate is designed for microwave use. Avoid overcrowding the plate, as this inhibits proper heat circulation. This method won’t replicate a toaster’s crunch perfectly but offers a fast, safe way to toast bread when you’re in a rush.
How to Toast Bread Without a Toaster Over a Campfire or Grill
Choose sturdy bread like sourdough or whole grain to withstand the open flame without burning too quickly. Set up your campfire or grill with a moderate, consistent heat zone to avoid charring the bread.
Use a grill grate or a long-handled fork to hold the bread close enough for even toasting, and turn it frequently for a golden finish.
Choosing the Right Bread
What kind of bread works best when you’re toasting over an open flame? You want bread with high durability to withstand direct heat without falling apart. Choose varieties with a firm crumb and a thick crust, like sourdough or artisan country bread.
The crust thickness protects the interior from burning too quickly, allowing even toasting. Avoid soft breads with thin crusts, as they tend to char or become soggy. Also, thicker slices, about an inch, offer better structural integrity and absorb heat more evenly.
If you’re using sandwich bread, opt for sturdy whole grain or rye options rather than delicate white bread. Selecting bread with these qualities ensures your toast will crisp nicely without crumbling or burning when you cook it over a campfire or grill.
Setting Up the Fire
How closely you manage your fire’s heat directly affects how evenly your bread toasts. Start by building a small, controlled fire with dry, seasoned wood or charcoal to ensure consistent heat.
Arrange the wood in a teepee or log cabin style for better airflow, which helps with smoke management. Avoid thick smoke that can impart unpleasant flavors and irritate your eyes.
Once the flames die down, let the embers glow steadily; this provides stable, even heat ideal for toasting. Position your grill grate about 6 to 8 inches above the embers to prevent burning.
Always keep a bucket of water or sand nearby to quickly extinguish the fire if needed, prioritizing fire safety throughout your cooking process. This setup ensures you have the right heat and control for perfect toast.
Toasting Techniques and Tips
Where you place your bread and how you monitor it make all the difference when toasting over an open flame or grill. Understanding toast science helps you achieve the perfect crust texture without burning. Follow these steps:
- Position your bread on a grill rack or a flat stone about 6 inches above medium heat to ensure even heat distribution.
- Flip the bread every 30 seconds to prevent burning and to develop a uniform golden crust.
- Watch closely for subtle color changes. When the edges turn a rich amber, the crust texture is ideal.
Maintaining control over distance and timing lets you harness radiant heat efficiently. Properly applying these techniques results in toast that’s crisp outside yet tender inside, all without a toaster.
Frequently Asked Questions
Can You Freeze Bread After Toasting Without a Toaster?
Yes, you can freeze bread after toasting using alternative toasting methods like a pan or oven. Just let the toast cool completely, then wrap tightly to freeze, preserving its texture and flavor effectively.
What Are the Best Spreads for Toast Made Without a Toaster?
The best spreads for your toast depend on its texture. Cream cheese suits softer toast, while nut butters and avocado complement crunchier slices.
Jam and honey add sweetness and moisture, enhancing every bite without overpowering.
How Long Does Toasted Bread Last Without Refrigeration?
When it comes to toasting alternatives, toasted bread lasts about 1-2 days without refrigeration if kept dry and sealed.
For bread preservation, store it in a cool, airtight container to avoid mold and staleness creeping in.
Is It Safe to Toast Bread Using a Hairdryer?
It’s not safe using a hairdryer to toast bread. The heat is uneven and insufficient, plus it risks electrical hazards and fire.
Avoid this unusual but risky method. Opt for safer alternatives like a pan or oven instead.
Can Gluten-Free Bread Be Toasted Without a Toaster?
Of course, gluten-free bread refuses to toast itself magically. You can use toaster alternatives like a skillet or oven, just watch closely to avoid burning. These methods crisp gluten-free bread evenly without a traditional toaster’s fuss.
Conclusion
Now you know how to toast bread without a toaster using simple methods like your oven, stovetop, or even a campfire. Did you know nearly 70% of households worldwide don’t own a toaster?
With these techniques, you can enjoy perfectly crispy toast anytime, anywhere. Just remember to keep an eye on your bread, flip frequently, and butter it while warm for the best flavor.
Toasting without a toaster is easier—and tastier—than you might think! These easy ways to cook toast without a toaster ensure you never miss out on delicious, crispy bread.