How to Clean Inside Toaster
When you clean inside your toaster, safety and thoroughness are key. Start by unplugging the unit and letting it cool completely to avoid burns or electrical hazards. Cleaning inside your toaster regularly helps maintain its performance and extends its lifespan.
Next, remove and empty the crumb tray to clear out loose debris. You’ll want to carefully dislodge crumbs from the slots without damaging the heating elements. Understanding the right tools and methods can make this process efficient and effective—so let’s explore the precise steps you’ll need to follow.
Key Takeaways
- Unplug the toaster and let it cool completely before cleaning inside to avoid electric shock and burns.
- Remove and empty the crumb tray, then gently shake the toaster upside down to dislodge loose crumbs.
- Use a soft-bristle brush or compressed air to carefully clean crumbs from slots without damaging heating elements.
- Avoid using water or liquid cleaners inside the toaster to prevent electrical damage.
- Reinstall the crumb tray securely and wipe the interior with a dry cloth to remove any remaining debris.
Why You Should Clean Your Toaster
Why should you clean your toaster regularly? Maintaining toaster safety is essential to prevent fire hazards caused by accumulated crumbs. Crumb prevention reduces the risk of sparks igniting inside your toaster, which can lead to damage or injury.
Regular cleaning guarantees that crumbs, grease, and food particles don’t block heating elements or ventilation, which can cause overheating. You’ll also improve your toaster’s efficiency by allowing heat to distribute evenly.
Neglecting crumb buildup can cause malfunction or uneven toasting, shortening the appliance’s lifespan. To optimize toaster safety, unplug the toaster before cleaning, then remove and empty the crumb tray frequently.
Tools You Need to Clean Your Toaster
To clean your toaster effectively, you’ll need specific tools like a soft brush, a microfiber cloth, and a crumb tray or container.
Don’t forget safety equipment such as insulated gloves to protect your hands from sharp edges and electrical components. Gathering these items beforehand ensures a thorough and safe cleaning process.
Essential Cleaning Tools
What tools do you need to effectively clean the inside of your toaster? Selecting the right tools ensures you maintain clearance settings and avoid any warranty implications.
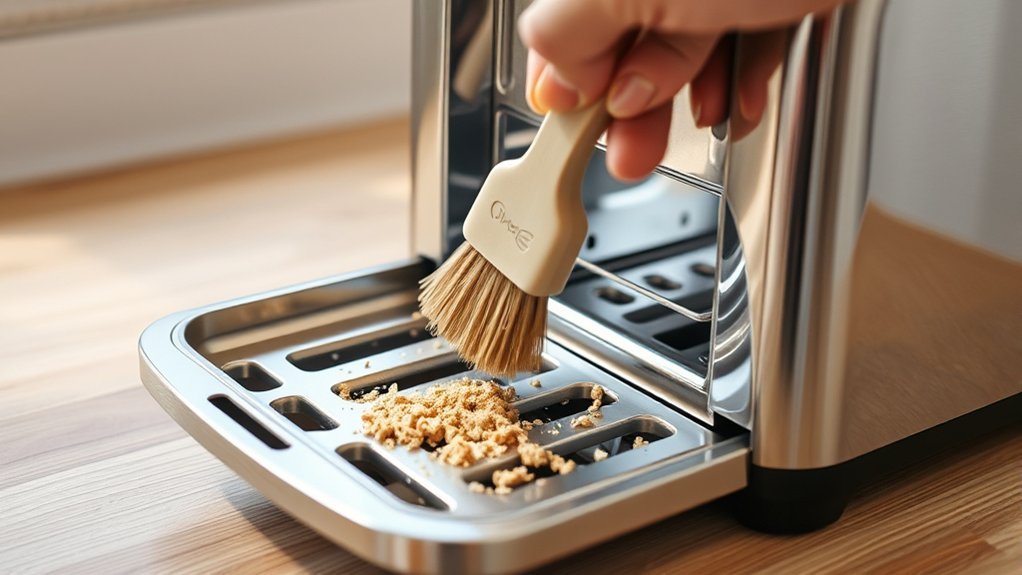
Start with a soft-bristle brush to dislodge crumbs without damaging internal components. Use a small handheld vacuum with a narrow nozzle to extract debris safely.
A microfiber cloth helps wipe down surfaces without scratching. Finally, a thin wooden or plastic pick allows you to reach tight spaces without causing electrical harm.
Avoid metal tools that risk voiding your warranty or altering clearance settings. Using these tools methodically will keep your toaster clean and fully functional.
Here’s what you’ll need:
- Soft-bristle brush
- Small handheld vacuum with narrow nozzle
- Microfiber cloth
- Wooden or plastic pick
Safety Equipment Needed
Along with selecting the right cleaning tools, you’ll need the proper safety equipment to protect yourself and your toaster during the cleaning process. Start by wearing safety gloves to shield your hands from sharp edges inside the toaster and from any cleaning chemicals you might use.
Choose gloves that offer a snug fit and heat resistance if you clean soon after use. Next, always wear eye protection, such as safety goggles, to prevent debris or cleaning agents from irritating or injuring your eyes. Ensure your eye protection fits securely and provides a clear field of vision.
Preparing Your Toaster for Cleaning
First, unplug your toaster and allow it to cool completely to prevent electrical hazards and burns.
Next, carefully remove the crumb tray and empty any loose debris.
Finally, turn the toaster upside down over a trash bin to shake out remaining crumbs.
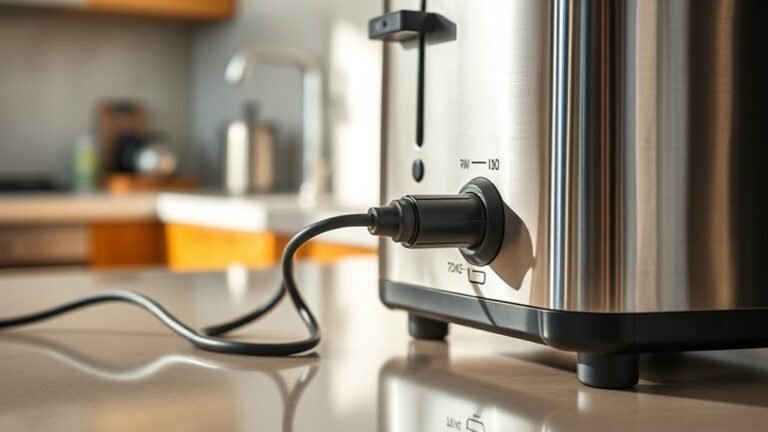
Unplug And Cool Down
How do you guarantee safety before cleaning your toaster? First, always unplug and cool down the appliance to avoid electric shock or burns. Disconnect the power cord from the outlet immediately after use. Allow the toaster to sit idle for at least 30 minutes, ensuring internal components reach a safe temperature.
Before starting, gather proper safety equipment needed: insulated gloves, a dry cloth, and safety goggles. This equipment protects you from residual heat and accidental contact with electrical parts.
Always unplug and verify power disconnection.
Wait for the toaster to cool completely.
Use insulated gloves to handle the toaster.
Avoid wet cloths near electrical components.
Following these steps ensures a safe cleaning environment and prevents injury or damage.
Remove Crumbs And Debris
Once your toaster is unplugged and cooled, focus on removing crumbs and debris to prevent buildup that can cause malfunctions or fire hazards. First, locate and carefully remove the crumb tray, typically found at the bottom or side of the toaster.
Empty the tray into a trash bin, ensuring thorough crumb disposal to avoid residue accumulation. Use a soft brush or compressed air to dislodge crumbs from internal slots without damaging heating elements. Avoid using sharp objects, as they may void your toaster warranty or cause internal damage.
After cleaning, reinstall the crumb tray securely. Regularly performing this step maintains optimal toaster performance and extends its lifespan. Always consult your toaster’s manual for specific cleaning instructions to protect your warranty and device integrity.
How to Empty the Crumb Tray
Anyone who uses a toaster regularly knows that crumbs can quickly accumulate in the crumb tray, affecting performance and cleanliness. To empty the crumb tray on your combi toaster, first unplug the appliance to ensure safety.
Locate the crumb trap, usually a removable tray at the toaster’s base. Carefully slide out the crumb tray without tilting to avoid spilling crumbs. Dispose of the crumbs in a trash bin, then wipe the tray with a damp cloth to remove residue.
Finally, slide the tray back securely into place before plugging the toaster back in.
- Unplug toaster before handling crumb tray
- Identify crumb trap location on combi toaster
- Remove tray carefully to avoid spilling crumbs
- Clean tray with a damp cloth before reinserting
Shaking Out Loose Crumbs From Your Toaster
Loose crumbs often remain trapped inside the toaster even after you’ve emptied the crumb tray. To remove these, first unplug the toaster and hold it over a trash bin. Gently shake the toaster to dislodge any crumbs stuck inside.
Use controlled, small shakes to avoid damaging internal components. Focus on the area near the crumb tray, as crumbs tend to accumulate there. After shaking crumbs out, inspect the crumb tray and surrounding area to confirm it’s clear.
If necessary, repeat shaking crumbs out until no more debris falls. Avoid inserting sharp objects to shake crumbs loose, as this can damage the toaster. Proper shaking crumbs technique ensures thorough crumb removal, reducing fire hazards and maintaining toaster efficiency.
How to Clean Toaster Slots Effectively
To clean your toaster slots effectively, start by safely removing any remaining crumbs without damaging the interior components. Use compressed air to blow out hard-to-reach debris, ensuring the heating elements stay dry and intact.
Finally, carefully wipe the heating elements with a soft brush to maintain ideal toaster performance.
Removing Crumbs Safely
Where do crumbs accumulate most inside your toaster? They typically settle at the bottom tray and within the slots, posing fire hazards if not addressed. For effective crumb safety and debris removal, always unplug your toaster before cleaning. Follow these steps:
Remove the crumb tray carefully to avoid scattering debris. Use a soft brush to dislodge crumbs from slots without damaging heating elements. Gently shake the toaster upside down over a trash bin to release stuck crumbs.
Avoid using metal utensils that could damage components or cause electrical hazards.
Using Compressed Air
How often should you use compressed air to clean your toaster slots? Ideally, perform this task every few weeks or after noticeable crumb buildup. Begin by unplugging the toaster to eliminate safety risks.
Use short bursts of compressed air aimed directly into each slot, maintaining a safe distance to avoid damaging internal components. Ensure the air pressure complies with manufacturer recommendations to address compliance concerns and prevent voiding warranties.
Avoid inserting objects into the slots; compressed air dislodges debris without contact. Work in a well-ventilated area to prevent inhaling dust particles.
After thorough cleaning, visually inspect the slots to confirm no residual crumbs remain. Using compressed air is an effective, non-invasive method that minimizes safety risks while maintaining your toaster’s optimal performance.
Cleaning Heating Elements
Why focus on cleaning the heating elements inside your toaster? Proper maintenance of these components ensures efficient toasting and extends your appliance’s lifespan. When cleaning heating elements, prioritize heat element safety to prevent damage or electric shock.
Follow these cleaning methods for effective results:
- Unplug the toaster and allow elements to cool completely before cleaning.
- Use a soft brush or compressed air to remove crumbs and debris without bending the elements.
- Avoid using water or liquid cleaners directly on the heating elements to prevent short circuits.
- Inspect elements for damage or discoloration; replace if necessary to maintain performance.
Removing Stubborn Stains and Burnt Residue Inside
When tackling stubborn stains and burnt residue inside your toaster, you’ll need the right tools and techniques to avoid damaging its delicate components. Start by unplugging the toaster and removing the crumb tray. Use a soft-bristle brush or a dry, lint-free cloth to gently dust knobs and other controls, preserving finish integrity.
For burnt residue on the interior walls, apply a paste of baking soda and water sparingly with a non-abrasive sponge. Let it sit for 10 minutes to loosen grime. Carefully wipe away residue with a damp cloth, ensuring no moisture reaches electrical parts.
Avoid harsh chemicals or scrubbing pads that could scratch surfaces or damage heating elements. Reassemble only when completely dry to maintain safe operation and extend your toaster’s lifespan.
Cleaning the Exterior of Your Toaster
After thoroughly addressing the interior, turn your attention to the toaster’s exterior, where grease, dust, and fingerprints accumulate. Proper crumb management is essential here to minimize exposure risks to contaminants.
Begin by unplugging the toaster to guarantee safety. Use a soft, damp cloth with mild detergent to wipe the surface, avoiding abrasive materials that can scratch the finish. Pay special attention to vents and buttons, where crumbs and grime often lodge.
- Wipe exterior surfaces with a microfiber cloth
- Use a soft brush for crevices and vents
- Avoid excessive moisture to prevent electrical damage
- Dry thoroughly to prevent rust and residue buildup
Following these steps maintains hygiene and reduces exposure risks, extending your toaster’s lifespan.
Tips to Prevent Crumb Buildup
How often should you clean your toaster to prevent crumb buildup? Adopting a maintenance mindset helps you stay ahead of crumb accumulation. After each use, unplug the toaster and gently shake it over a trash bin to dislodge loose crumbs.
Use a soft brush to sweep crumbs from the interior slots, avoiding damage to heating elements. Consider using a toaster crumb tray if your model has one; empty it regularly to enhance crumb prevention. Avoid inserting sharp objects that can damage internal components.
Store your toaster in a clean, dry area to minimize external debris entering the slots. By integrating these precise steps into your routine, you reduce the risk of crumb buildup, maintain optimal toaster function, and extend its lifespan effectively.
How Often to Clean Your Toaster for Best Results
Regularly cleaning your toaster ensures peak performance and safety. To maintain optimal function and avoid hazards, you should clean crumb locations frequently, especially if you often toast toaster pastries that shed flakes.
Regular toaster cleaning boosts performance and safety, especially when toasting flaky pastries.
Here’s how often to clean your toaster:
- After every 3-4 uses, empty the crumb tray to prevent buildup.
- Wipe down the exterior weekly to remove grease or residue.
- Inspect crumb locations thoroughly once a month for hidden debris.
- Deep clean the interior every 2-3 months, unplugging it first to avoid electrical risks.
Consistent cleaning prevents overheating and reduces fire risk. By following this schedule, you’ll keep your toaster in top condition, extending its lifespan and ensuring safe, efficient operation.
Frequently Asked Questions
Can I Use a Dishwasher to Clean Toaster Parts?
You shouldn’t use a dishwasher for toaster postmortem parts; water and heat can damage electrical components. Focus on crumb management by manually removing crumbs with a brush or shaking them out to maintain toaster function safely.
Is It Safe to Clean a Toaster With Vinegar?
You’re steering clear of a vinegar storm; yes, it’s safe if you avoid soaking toaster parts or the heating elements. Use diluted vinegar on surfaces, never dishwasher, to preserve your toaster’s function and ensure vinegar safety.
How Do I Fix a Toaster That Won’T Pop Up?
To fix your toaster that won’t pop up, start by unplugging it. Then troubleshoot pop up issues by inspecting the lever mechanism for obstructions, checking the spring tension, and ensuring the latch engages properly before testing again.
Can I Use a Vacuum Cleaner to Remove Toaster Crumbs?
Yes, you can use a vacuum cleaner for crumb removal, but ensure vacuum safety by unplugging the toaster first. Use a narrow nozzle attachment to avoid damage and effectively remove crumbs without pushing them further inside.
Are Toaster Cleaning Sprays Safe for Food Contact Surfaces?
You shouldn’t use toaster cleaning sprays on food contact surfaces unless they’re explicitly labeled food-safe. Prioritize food safety by choosing non-toxic, residue-free products designed specifically for toaster cleaning to avoid contamination risks.
Conclusion
You might think crumbs inside your toaster add character, but they’re more likely to spark trouble than charm. By regularly unplugging, brushing, and shaking out debris, you prevent smoky surprises and extend your toaster’s life.
Don’t let those tiny crumbs wage a quiet rebellion—take control with simple, precise cleaning steps. A spotless toaster isn’t just cleaner; it’s safer and more efficient.
Remember, keeping the inside of your toaster clean is essential. A little effort goes a long way in maintaining a perfectly toasted morning.