Can You Wash Toaster
You might wonder, can you wash a toaster without causing damage? While the idea of cleaning it thoroughly sounds practical, improper methods can lead to electrical hazards or appliance failure.
To ensure safety and maintain functionality, you need to understand which parts can be cleaned, how to handle moisture carefully, and which cleaning techniques to avoid.
Let’s explore the essential precautions and steps you should follow.
Key Takeaways
- Never submerge a toaster in water due to severe electrical shock and fire risks.
- Always unplug and let the toaster cool completely before cleaning any parts.
- Clean crumb trays regularly by removing and shaking them out without using water.
- Use minimal moisture with a damp cloth or specialized cleaners only on exterior surfaces.
- Avoid abrasive tools or dishwasher detergents; use soft brushes and mild, non-abrasive cleaners instead.
Can You Clean Your Toaster Without Damaging It?
You can clean your toaster without damaging it by following specific precautions and using appropriate methods. Begin by unplugging the toaster and allowing it to cool completely. Remove the crumb tray carefully; this prevents crumbs from affecting bread texture and reduces fire risk.
Use a soft brush or cloth to dislodge crumbs and debris inside the toaster slots gently. Avoid abrasive materials that could damage heating elements or outer surfaces. Proper toaster storage also contributes to hygiene and performance. Store your toaster in a dry, dust-free environment to prevent moisture buildup that could impair functionality.
Regular cleaning maintains consistent bread texture by preventing burnt residue buildup. By adhering to these methods, you maintain your toaster’s efficiency and lifespan without risk of internal damage or compromised safety.
Why You Should Never Submerge Your Toaster in Water
You should never submerge your toaster in water because it poses serious electrical hazard risks that can cause shocks or short circuits. Water damages the internal components, rendering the appliance inoperable.
Additionally, moisture inside the toaster increases the risk of fire when it’s powered on.
Electrical Hazard Risks
How dangerous can submerging a toaster in water be? When you immerse a toaster, you create an immediate electrical hazard risk. Water and electricity don’t mix well; water causes short circuits by bridging electrical contacts inside the device.
This can lead to electric shocks when you next plug it in, posing serious injury risks. Additionally, residual moisture trapped internally increases the likelihood of electrical arcing, which could spark fires. These two-word risks, “electric shock” and “fire hazard,” are central discussion ideas in understanding why you should never submerge your toaster.
Even if unplugged, capacitors may store charge, so avoid water exposure. Instead, focus on safer cleaning methods to prevent dangerous outcomes linked to electrical hazards inherent in wet conditions inside your toaster.
Damage To Internal Components
Beyond the immediate risk of electric shock or fire, submerging your toaster can cause severe damage to its internal components. Water infiltrates delicate parts like heating elements, thermostats, and wiring, leading to corrosion and short circuits that compromise functionality.
Once moisture penetrates, it disrupts electrical pathways, causing permanent failure or erratic performance. Even drying the toaster thoroughly won’t restore damaged circuitry. Despite creative writing or social media trends promoting unconventional cleaning hacks, these methods risk voiding warranties and reducing lifespan.
Instead, stick to manufacturer-recommended cleaning techniques that avoid internal exposure to liquids. Understanding how internal components react to water helps you protect your appliance, ensuring safety and longevity while resisting impulsive social media-inspired cleaning fads that could irreparably harm your toaster.
Fire Safety Concerns
Why does submerging a toaster in water create a significant fire hazard? When water infiltrates the toaster’s electrical components, it compromises insulation and may cause short circuits. These electrical faults can generate sparks or overheating, directly threatening fire safety.
You must avoid immersing your toaster to maintain proper toasting safety, as water exposure damages wiring and heating elements. Even if the toaster appears dry externally, internal moisture can persist, increasing the risk of electrical failure during operation.
Instead, clean your toaster using recommended methods that avoid water contact with electrical parts. Prioritizing fire safety means recognizing that submersion risks irreversible damage and potential fires, making it essential to follow safe cleaning practices and never soak your toaster in water.
How to Avoid Electrical Damage When Cleaning Your Toaster
Before you start cleaning your toaster, always unplug it to eliminate the risk of electrical shock. Use only a damp cloth or minimal moisture to avoid water seeping into electrical components.
These precautions help preserve your toaster’s functionality and guarantee safe maintenance.
Unplug Before Cleaning
How can you prevent electrical damage when cleaning your toaster? The first and most essential step is to unplug it from the power source. This simple action eliminates any risk of electric shock or short circuits caused by moisture contact with live components.
Treating cleaning like an unrelated topic or random pairing with the toaster’s electrical functions leads to dangerous assumptions. Never attempt to clean the toaster while it remains plugged in, as residual current can cause damage or injury.
Confirm the plug is fully disconnected and that the toaster has cooled down before proceeding. By strictly following this protocol, you maintain both your safety and the toaster’s operational integrity, preventing electrical faults during cleaning.
This foundational step is non-negotiable for safe toaster maintenance.
Use Minimal Moisture
Where should you apply moisture when cleaning your toaster to avoid electrical damage? Always limit moisture to external surfaces only. Use a damp cloth rather than pouring water directly onto or inside the appliance.
Excess moisture risks penetrating electrical components, causing short circuits or corrosion. For effective toaster safety, avoid submerging any part of the toaster.
Focus your cleaning on crumb trays and outer panels, ensuring these areas are dry before reassembling. Employ two word discussion ideas such as “moisture control” and “component protection” to guide your process.
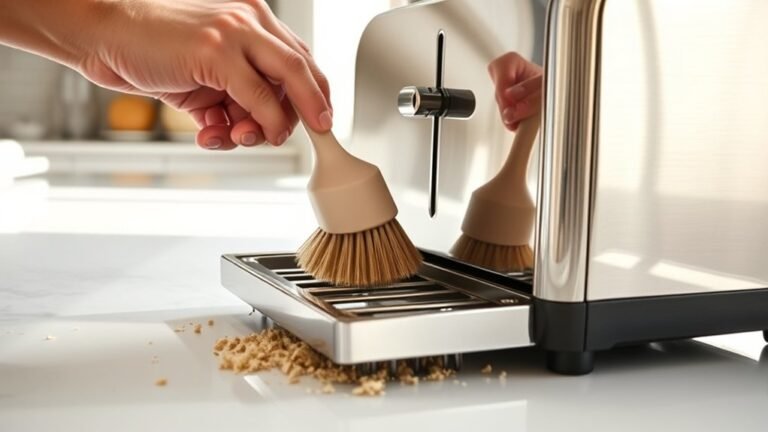
How to Safely Remove Crumbs From Your Toaster
Why should you regularly remove crumbs from your toaster? Crumbs can accumulate, creating fire hazards and impairing toaster physics by obstructing heating elements and airflow. This two word discussion idea “crumb buildup” highlights risks of overheating and uneven toasting.
To safely remove crumbs, first unplug the toaster and ensure it’s completely cool. Next, invert it over a trash bin and gently shake to dislodge loose debris. Avoid using water or liquids, which may damage electrical components or cause rust.
For stubborn crumbs, use a soft brush or compressed air to clear tight spaces without harming delicate parts. Regular crumb removal maintains optimal toaster function, reduces fire risk, and extends appliance longevity. Practicing this simple routine aligns with proper toaster physics principles and enhances safety.
Tools and Techniques to Clean Toaster Slots
Cleaning toaster slots demands the right tools and techniques to avoid damaging delicate components. Start with a soft-bristled brush or a specialized crumb brush to remove loose debris while preserving toaster aesthetics. Avoid metal utensils that can scratch internal surfaces or harm heating elements.
Use compressed air sparingly to dislodge stubborn crumbs without introducing moisture. When addressing material compatibility, ensure any cleaning tool is non-abrasive and heat-resistant to protect slot interiors. For sticky residues, lightly dampen a microfiber cloth with isopropyl alcohol, applying it carefully to avoid electrical parts.
Always unplug the toaster before cleaning. These methods maintain functionality and extend your toaster’s lifespan by balancing thorough cleaning with preservation of both internal parts and overall appearance.
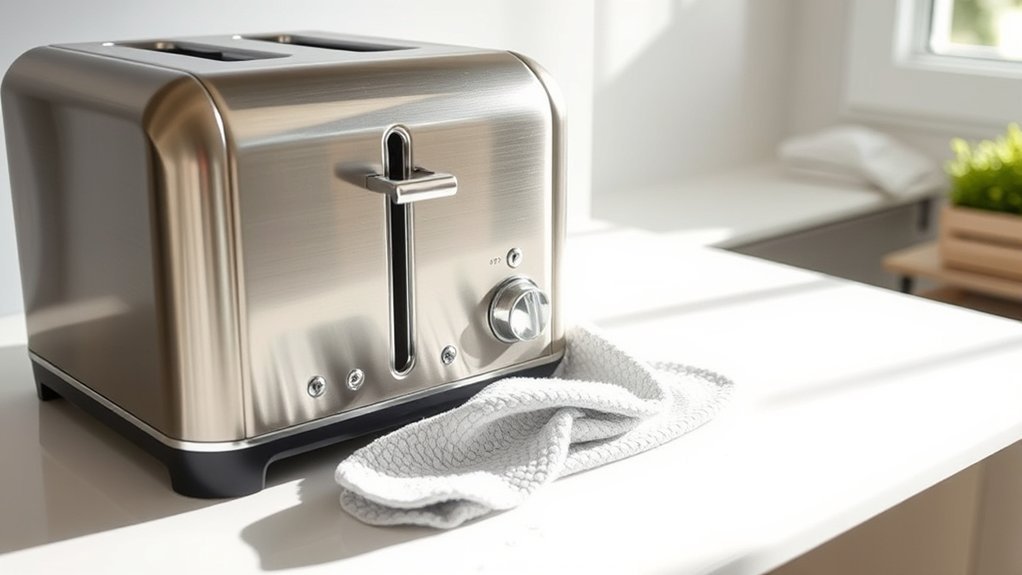
How to Clean the Exterior of Your Toaster
How often should you wipe down your toaster’s exterior to maintain its appearance and hygiene? Ideally, clean it weekly to prevent buildup from affecting toaster physics. Heat transfer efficiency can degrade if grease or dust accumulates. Use a soft, damp cloth with mild detergent to remove fingerprints, oil, and crumbs stuck on surfaces.
Avoid excess moisture, as crumb physics show that trapped water can lead to corrosion or electrical faults. Focus on buttons, knobs, and vents where residue gathers. For stainless steel models, apply a specialized cleaner to restore shine without damaging the finish.
Regular exterior cleaning not only preserves your toaster’s look but also supports optimal function by minimizing heat loss and ensuring crumb physics don’t contribute to malfunction. Always unplug your toaster before cleaning to ensure safety.
Are Dishwasher or Abrasive Cleaners Safe for Toaster Cleaning?
When should you consider the safety of using dishwasher or abrasive cleaners on your toaster? Avoid these methods if your toaster features delicate metal finishing, as harsh chemicals and abrasive scrubbing can damage coatings or cause corrosion.
Dishwasher detergents contain strong agents that may degrade plastic and metal components, compromising functionality and appearance. Following proper cleaning etiquette means selecting gentle, non-abrasive products designed for kitchen appliances.
Dishwasher detergents can harm plastic and metal parts; always choose gentle, non-abrasive cleaners for your appliances.
Instead of dishwasher use, opt for a soft cloth with mild detergent. Abrasive cleaners, including scouring pads, risk scratching metal surfaces, undermining durability and aesthetics.
Prioritize manufacturer guidelines to maintain your toaster’s integrity. In short, dishwasher and abrasive cleaners are generally unsafe for toaster cleaning due to potential metal finishing damage and mechanical risks.
Stick to gentle, manual cleaning methods to preserve your appliance’s lifespan and appearance.
How to Dry Your Toaster Properly After Cleaning
Although drying your toaster may seem straightforward, improper drying can lead to electrical hazards or internal damage. To avoid safety misconceptions, never plug in your toaster until it’s completely dry.
After cleaning, use a lint-free cloth to wipe all exterior surfaces and gently shake out any trapped water inside. Avoid common maintenance myths like using heat sources (hairdryers or ovens) to speed drying, as excessive heat can damage components.
Instead, leave your toaster open in a well-ventilated area for several hours or overnight to ensure thorough air drying. Confirm no moisture remains in the crumb tray or interior before reassembly.
Following these precise steps prevents corrosion and electrical shorts, preserving your toaster’s functionality and safety.
How Often Should You Clean Your Toaster for Best Results?
Why does regular toaster cleaning matter? Maintaining a clean toaster ensures optimal performance, extends the appliance’s lifespan, and prevents potential fire hazards from accumulated crumbs. For best results, clean your toaster every four to six weeks, depending on usage frequency.
If you use it daily, a bi-weekly cleaning is advisable. Staying updated with kitchen gadget trends, many modern toasters feature removable crumb trays, making routine maintenance easier and more efficient.
Incorporating this practice aligns well with seasonal gift ideas. Consider gifting a toaster with advanced self-cleaning features or accessories that simplify upkeep. Consistent cleaning not only preserves your toaster’s functionality but also supports a hygienic kitchen environment, essential for safe and effective food preparation.
Cleaning Grease and Stains From Your Toaster
You’ll want to start by locating grease spots and stains on your toaster’s surface and interior. Use effective cleaning solutions like a mixture of mild detergent and warm water or a baking soda paste to break down stubborn residues.
To prevent future buildup, wipe your toaster regularly and avoid letting crumbs or grease accumulate.
Identifying Grease Spots
How can you quickly spot grease spots on your toaster? First, examine the exterior surface under bright, direct light; grease spots often appear as shiny, translucent patches distinct from the surrounding matte finish. Check areas near buttons, levers, and crumb trays, as these spots accumulate from cooking oils and residue.
You might also notice discoloration or darkened patches indicating staining. Use a clean, dry microfiber cloth to gently wipe suspected areas. If the cloth picks up oily residue, you’ve confirmed grease spots.
Identifying these precisely is crucial for effective staining removal. Avoid mistaking dust or crumbs for grease by running your finger lightly over the surface; grease feels slick or sticky. Accurate identification allows targeted cleaning, ensuring you apply appropriate techniques without damaging your toaster’s finish.
Effective Cleaning Solutions
When tackling grease and stains on your toaster, choosing the right cleaning solution is essential for effective removal without damaging the appliance. Start with a mild detergent mixed in warm water for a short cleaning session. This solution breaks down grease without corroding metal or plastic surfaces.
For tougher stains, apply a baking soda paste—three parts baking soda to one part water. Allow it to sit for a few minutes, then gently scrub with a soft brush. Always unplug the toaster before cleaning and ensure it’s completely dry before plugging it back in to adhere to safety measures.
Avoid abrasive cleaners that can scratch surfaces or compromise the toaster’s functionality. This approach ensures efficient stain removal while maintaining your appliance’s integrity.
Preventing Future Stains
Why does preventing future stains on your toaster matter? Future stains can accumulate grease and food particles that degrade your toaster’s performance and hygiene.
To enhance stain prevention, clean your toaster regularly after each use, removing crumbs and wiping down exterior surfaces with a damp cloth. Avoid using harsh chemicals that may damage the finish or internal components.
Consider applying a light coating of food-safe mineral oil on metal parts to reduce residue buildup. Additionally, prevent grease splatters by placing a paper towel beneath the toaster during use or avoiding overly greasy foods.
Implementing these stain prevention measures extends your toaster’s lifespan, maintains efficient heating, and keeps it looking clean. Consistent maintenance is essential for optimal functionality and hygiene in your kitchen appliance.
Frequently Asked Questions
Can a Dirty Toaster Affect the Taste of My Toast?
Yes, a dirty toaster can affect your toast’s flavor. Toaster odor and crust residue buildup transfer unpleasant tastes and smells, impacting the quality of your toast.
Regular cleaning prevents this contamination effectively.
Is It Safe to Use Metal Objects to Fix a Stuck Toaster Lever?
You shouldn’t use metal objects to fix a stuck toaster lever; it risks electric shock and damage. Instead, try the two word discussion idea “manual reset” or “service call” to ensure safe, effective repair.
What Should I Do if My Toaster Sparks While in Use?
If your toaster sparks while in use, unplug it immediately to ensure toaster safety. Inspect for debris or damage, then follow cleaning tips to remove crumbs safely.
Avoid metal objects and consult a professional if sparking persists.
Can I Use a Toaster for Anything Other Than Bread?
Think of your toaster as a forge, not just for bread but for unconventional bread methods like toasting bagels, English muffins, or reheating pastries.
Expanding toaster use demands precise timing and monitoring to avoid burning or uneven heating.
How Do I Know When It’s Time to Replace My Toaster?
You’ll know it’s time to replace your toaster when its lifespan exceeds 5 to 10 years, frequent malfunctions occur, or performance declines despite regular toaster maintenance.
Persistent issues signal that replacement is more efficient than repair.
Conclusion
You can clean your toaster safely without turning it into a soggy mess or an electrical hazard. Just unplug it before you begin and avoid soaking any parts in water. Focus on wiping down surfaces and removing crumbs regularly to maintain cleanliness.
Using gentle tools and drying thoroughly prevents damage and keeps your toaster performing like new. Clean it often enough, and you’ll avoid common issues like stuck crumbs or burnt smells.
By following these simple steps, you can keep your mornings smooth and your appliance spotless. Remember, knowing how to wash toaster properly is key to extending its lifespan and ensuring safe use.