How to Use Blender Software
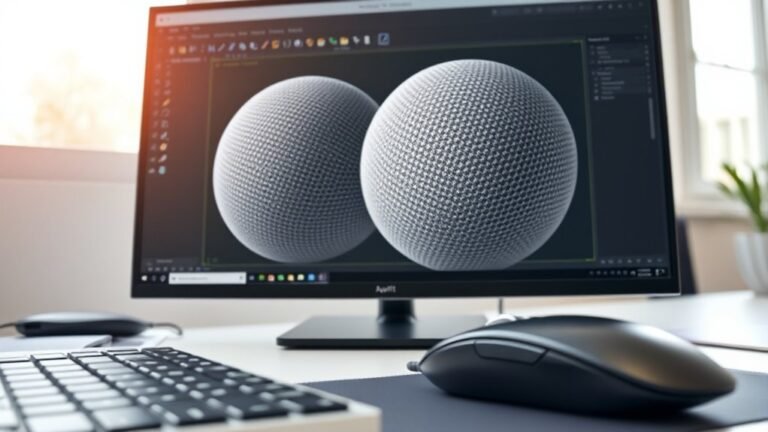
You could spend years mastering Blender software’s vast array of tools and still find new features to explore. When you first open the interface, the 3D Viewport, Outliner, and Properties panels might seem overwhelming, but each serves a precise purpose in shaping your project.
By understanding how to manipulate objects, set up lighting, and animate scenes, you’ll release the software’s true potential—starting with simple steps that lead to complex creations.
Key Takeaways
- Download Blender from blender.org, install it, and enable adding Blender to your system PATH for easy access.
- Learn to navigate Blender’s interface panels like 3D Viewport, Outliner, and Properties Editor using shortcuts like G, R, S.
- Create your first 3D object by pressing Shift + A, selecting a mesh, and transforming it precisely with move, rotate, and scale tools.
- Use modeling tools such as extrude, loop cut, bevel, and knife to shape objects with clean topology and smooth surfaces.
- Set up cameras and lighting carefully, adjusting intensity and color to define scene mood and guide viewer focus.
Download and Install Blender
Where do you begin when setting up Blender? First, you need to download Blender from the official website blender.org to ensure you get a safe, up-to-date version. Choose the appropriate installer for your operating system, such as Windows, macOS, or Linux.
The download process typically involves selecting the latest stable release, then saving the executable file to your system. Once the download completes, run the installer. During the install Blender process, you’ll encounter options like installation location and whether to add Blender to your system’s PATH variable. Enable this for easier command-line access.
Follow the prompts carefully, and after installation finishes, launch Blender to verify it runs smoothly. This precise download and install Blender sequence guarantees a solid foundation for your 3D projects.
Navigate Blender’s User Interface for Beginners
How do you efficiently find your way around Blender’s complex interface? Start by understanding the UI layout, which consists of multiple panels like the 3D Viewport, Outliner, Properties Editor, and Timeline. Each serves a specific function, allowing you to manage objects, scenes, and render settings seamlessly.
Familiarize yourself with shortcut mappings. These keyboard commands speed up navigation and editing. For example, pressing “G” grabs and moves objects, while “Shift + A” opens the Add menu.
You can customize the workspace by dragging panel edges or switching between preset layouts like Modeling or Sculpting to optimize your workflow. Learning these elements visually and through practice helps you navigate Blender’s interface with precision and confidence, setting a strong foundation for your 3D projects.
Create Your First 3D Object
With a solid grasp of Blender’s interface and shortcuts, you’re ready to create your first 3D object. Begin by pressing Shift + A to open the Add menu, then select Mesh and choose a basic shape like a cube.
Observe how the object appears in the viewport, noting its origin point and orientation. Use the G key to grab and move it, R to rotate, and S to scale, following a detailed progress to position your object precisely.
Avoid common pitfalls such as unintentionally moving the object out of view or scaling it disproportionately. Keep an eye on the numeric input fields for exact transformations.
This initial creation sets the foundation for your modeling journey. Focus on accuracy and control before moving to more complex tasks.
Master Basic Blender Modeling Tools
Mastering Blender’s basic modeling tools is essential for transforming simple shapes into detailed, precise 3D models. You’ll start by manipulating vertices, edges, and faces using tools like extrude, loop cut, and bevel. These allow you to refine geometry while respecting conceptual constraints, ensuring your model maintains structural integrity and logical form.
Use the knife tool for precise cuts, enhancing detail without unnecessary complexity. Pay close attention to aesthetic considerations—smooth curves, balanced proportions, and clean topology improve visual appeal and make your model easier to work with later.
As you practice, visualize how each adjustment affects the overall silhouette and surface flow. By mastering these basics, you’ll create models that are both technically sound and visually compelling, setting a solid foundation for advanced modeling techniques.
Edit and Transform Objects in Blender
You’ll start by mastering object selection techniques, such as box, circle, and lasso select, to pinpoint exactly what you want to edit.
Once selected, use Blender’s transformation tools: grab, rotate, and scale to manipulate objects precisely in 3D space. These tools let you reposition, adjust orientation, and resize with numerical input for exact control.
Object Selection Techniques
Selecting objects accurately forms the foundation for editing and transforming in Blender. You start by using scene selection methods like right-click or left-click, depending on your preference, to highlight objects.
Box select (B) lets you drag a rectangle over multiple objects, while circle select (C) enables brush-like selection for precision. Using tool shortcuts streamlines your workflow; for instance, pressing A selects or deselects all objects within the scene selection.
You can also shift-click to add or remove individual objects from your current selection. Pay attention to the Outliner panel for a hierarchical view, which helps manage complex scenes. Mastering these techniques ensures you manipulate exactly the objects you want, setting up a seamless editing and transformation process.
Transformation Tools Overview
After pinpointing the exact objects with selection techniques, the next step is to manipulate them using Blender’s transformation tools. These tools enable you to execute precise two word idea 1 and two word idea 2 adjustments, essential for shaping your 3D models.
You’ll primarily use Move, Rotate, and Scale functions, accessed via hotkeys or the toolbar, to edit object positions, orientations, and sizes. Each transformation respects pivot points, offering control over the manipulation center. Visual feedback in the viewport guides your adjustments for accuracy.
| Tool | Function Description |
|---|---|
| Move (G) | Repositions objects along axes |
| Rotate (R) | Rotates objects around pivot |
| Scale (S) | Resizes objects proportionally |
| Pivot | Defines transformation center |
Mastering these ensures efficient and precise editing in Blender.
Add Materials and Textures in Blender
Anyone working in Blender knows that adding materials and textures transforms a basic model into a visually compelling object. Start by entering the Shader Editor to create and assign materials to your mesh.
Use texture mapping to control how images wrap around your model, ensuring realistic surface detail. Before applying textures, perform UV unwrapping to flatten your 3D model’s surface into a 2D layout.
This step is crucial for accurate texture placement and prevents distortion. You can adjust UV islands in the UV Editor to optimize alignment.
Once unwrapped, connect image textures to the material nodes, linking color, roughness, or normal maps for varied effects. This precise workflow lets you visually enhance your model with detailed, customizable surfaces, elevating the realism and artistic quality of your Blender project.
Set Up Lighting and Cameras for Your Scene
You’ll start by selecting the right light types, like point, sun, or area lights, to shape your scene’s mood and shadows. Next, position your cameras to frame key elements precisely, using focal length and angle to control perspective.
Finally, adjust light intensity to balance brightness and contrast, ensuring your scene looks realistic and visually compelling.
Choosing Light Types
Selecting the right type of light is essential for defining the mood, depth, and realism of your scene in Blender. Each light type, such as Point, Sun, Spot, and Area, affects lighting design and color grading differently. This influences shadows, highlights, and color temperature.
Understanding their properties helps you craft scenes with accurate visual storytelling.
| Light Type | Effect on Scene | Best Use Case |
|---|---|---|
| Point | Omnidirectional glow | Small, localized lights |
| Sun | Parallel rays, sharp shadows | Outdoor daylight |
| Spot | Focused cone, adjustable angle | Stage or spotlight effects |
Use this table to choose your lights carefully and enhance your scene’s realism through precise control over light behavior and color grading.
Positioning Cameras Effectively
After choosing the appropriate light types to define your scene’s mood and depth, positioning your cameras strategically shapes how viewers perceive that lighting and composition. Start by arranging your camera layout to cover key angles, ensuring each shot complements the scene’s narrative.
Use Blender’s camera tools to precisely place cameras, considering height, distance, and angle relative to your subject. Adjust your focal length settings carefully; wider angles capture more environment but may distort, while longer focal lengths isolate details and compress space.
Experiment with focal length to balance context and focus. Don’t forget to lock camera transforms once satisfied to avoid accidental shifts. This deliberate setup enhances visual storytelling by guiding attention, emphasizing lighting contrasts, and framing your scene with clarity and impact.
Adjusting Light Intensity
When adjusting light intensity in Blender, you control how your scene’s mood and focus come alive through brightness and contrast levels. Intensity control is essential for highlighting details and setting atmosphere. To master adjusting light, follow these steps:
- Select your light source in the Properties panel.
- Locate the Strength or Power slider under the Light settings.
- Adjust the slider carefully to increase or decrease intensity, watching your scene update in real-time.
- Use the Color setting to tweak the light’s warmth or coolness, enhancing the visual tone.
Animate Your First Object in Blender
How do you bring a static object to life within Blender’s dynamic environment? Begin by selecting your object, then insert keyframes to define its position, rotation, or scale at specific frames. Use the Timeline to navigate and set these keyframes, paying close attention to animation timing—the precise frame placement that controls motion speed and fluidity.
You’ll encounter creative constraints, such as limited frame counts or desired motion paths, which challenge you to optimize movement within those boundaries. Adjust the Graph Editor to fine-tune interpolation curves, shaping acceleration and deceleration for realistic motion. Preview your animation via the Play button, iterating as needed.
This methodical approach lets you transform a simple mesh into a compelling animated asset, mastering Blender’s core animation workflow.
Render and Export Your Blender Projects
Finalize your project by rendering your scene to produce high-quality images or animations ready for export. In Blender, you’ll adjust render settings in the Properties panel under the Render tab. Choose your render engine (Cycles or Eevee) to balance quality and speed. Then, set resolution, samples, and output file format.
- Open the Render Properties and select your preferred render engine.
- Configure output resolution and sampling for crisp visuals.
- Go to Output Properties to pick file formats—PNG for images, or FFmpeg for video exports.
- Hit Render > Render Image or Render Animation to start processing.
After rendering, export your project using the specified file formats to ensure compatibility with other software or platforms. This step locks in your project’s visual fidelity.
Blender Workflow Tips to Speed Up Your Projects
Although mastering Blender’s vast toolset takes time, adopting efficient workflow strategies can dramatically speed up your projects. Start by customizing your workspace to streamline repetitive tasks. Organize panels and use keyboard shortcuts to navigate swiftly.
Integrate creative workflows like node-based materials and procedural textures to reduce manual adjustments. Utilize Blender’s asset libraries to reuse models and materials, minimizing redundant creation.
For team projects, implement collaboration techniques such as linked libraries and version control via Blender’s built-in tools or external platforms like Git. These methods keep your work synchronized and editable without overwriting others’ contributions.
Finally, leverage viewport rendering previews and proxy objects to maintain responsiveness during complex scenes. By combining these approaches, you’ll cut down project times significantly while maintaining high-quality results.
Frequently Asked Questions
Can Blender Be Used for 2D Animation Projects?
Yes, you can use Blender for 2D animation projects by leveraging its Grease Pencil tool. You’ll create detailed strokes and layers, enabling fluid motion.
Unrelated pairing: quantum computing, botanical illustration, both unrelated but fascinating fields.
How Do I Customize Blender’s Keyboard Shortcuts?
You might think customizing Blender’s shortcuts is complex, but it’s straightforward. Head to Preferences > Keymap, where you can edit key mapping visually.
Assign custom shortcuts by clicking an action, pressing your desired keys, and saving.
What Are the System Requirements for Running Blender Smoothly?
You’ll need a multi-core CPU, 8GB+ RAM, and a GPU with 4GB VRAM for smooth performance. These system requirements support 2D animation efficiency, keyboard customization, VR content suitability, and open source contribution seamlessly.
Is Blender Suitable for Creating VR Content?
You might think Blender’s open source nature limits VR content pipelines, but it’s actually powerful for VR creation. You’ll leverage its robust tools and community-driven open source contributions to build immersive, detailed virtual environments efficiently.
How Can I Contribute to Blender’s Open-Source Development?
You can contribute by following Blender’s contrib guidelines on their developer site, participating in bug triage to identify and prioritize issues, submitting patches, and engaging with the community via code reviews and discussion forums to improve Blender’s codebase.
Conclusion
Now that you’ve mastered Blender’s core tools, imagine crafting a futuristic cityscape for your portfolio. By combining precise modeling, strategic lighting, and smooth animations, you can create immersive scenes that captivate viewers.
Keep refining your workflow—use keyboard shortcuts and customize your workspace to speed up complex projects. With practice, you’ll move seamlessly from concept to polished render.
Turn your creative visions into stunning 3D realities that stand out professionally by harnessing the full potential of Blender software.