How Do I Clean a Beauty Blender
If you want your beauty blender to work flawlessly and last longer, cleaning a beauty blender properly is non-negotiable. Skipping this step can lead to clogged pores and uneven makeup application.
You’ll need more than just water—knowing the right cleansers and techniques makes all the difference. Ready to upgrade your routine and keep your sponge fresh and bacteria-free?
Let’s break down everything you need to know.
Key Takeaways
- Wet the beauty blender thoroughly and apply a gentle, soap-based cleanser designed for sponges.
- Massage the sponge to remove makeup residue, then rinse under warm water until water runs clear.
- Squeeze out excess moisture gently without twisting to avoid damaging the sponge.
- Air dry the sponge in a well-ventilated area and store it in a breathable container to prevent mold.
- Clean after every use for hygiene, and perform a deep soak weekly with warm water and gentle cleanser.
Why Clean Your Beauty Blender?
Maintaining your Beauty Blender’s cleanliness is essential for flawless makeup application and healthy skin. You might’ve heard cleaning myths suggesting you only need to rinse your sponge, but that’s far from the truth.
Residue buildup traps bacteria, which can cause breakouts and uneven coverage. Think of your Beauty Blender like a filter; if it’s clogged, your makeup won’t blend seamlessly. Incorporate quick makeup hacks like using gentle cleansers specifically designed for sponges or even a mild soap to maintain its texture and effectiveness.
Regular cleaning preserves the sponge’s bounce and prevents color contamination from previous products. So, ditch those cleaning myths and prioritize your blender’s hygiene. It’s a game-changer for radiant, smooth skin and flawless finishes every time.
How Often Should You Clean It?
You should clean your Beauty Blender after every use to prevent bacteria buildup and keep your skin clear. For a deeper cleanse, aim for a thorough weekly wash to remove stubborn makeup and oils.
This routine not only extends your sponge’s life but also guarantees flawless application every time.
Daily Cleaning Benefits
Regularly cleaning your beauty blender is essential to keep your skin clear and your makeup flawless. Daily maintenance prevents bacteria buildup, reduces breakouts, and preserves the sponge’s vibrant color protection.
You’ll also extend your blender’s lifespan while ensuring smooth, streak-free application every time.
| Benefit | Why It Matters |
|---|---|
| Bacteria Prevention | Avoids acne and skin irritation |
| Color Protection | Keeps the sponge looking fresh and new |
| Makeup Application | Ensures seamless, even foundation coverage |
| Sponge Longevity | Saves money by preventing premature wear |
Weekly Deep Clean
Beyond your daily routine, giving your beauty blender a thorough weekly deep clean tackles the buildup that quick cleans can miss. So, once a week, soak your sponge in warm water mixed with a gentle cleanser or a specialized beauty blender cleanser.
Gently massage to break down stubborn makeup and oils, then rinse until water runs clear. This deep clean is essential not just for removing grime but also for mold prevention. Trapped moisture can breed bacteria if left unchecked.
After washing, squeeze out excess water and let it air dry completely in a well-ventilated area. For storage optimization, avoid airtight containers; instead, choose a breathable holder that keeps your blender dry and fresh. This routine keeps your beauty blender hygienic and extends its lifespan.
How to Clean Your Beauty Blender by Hand
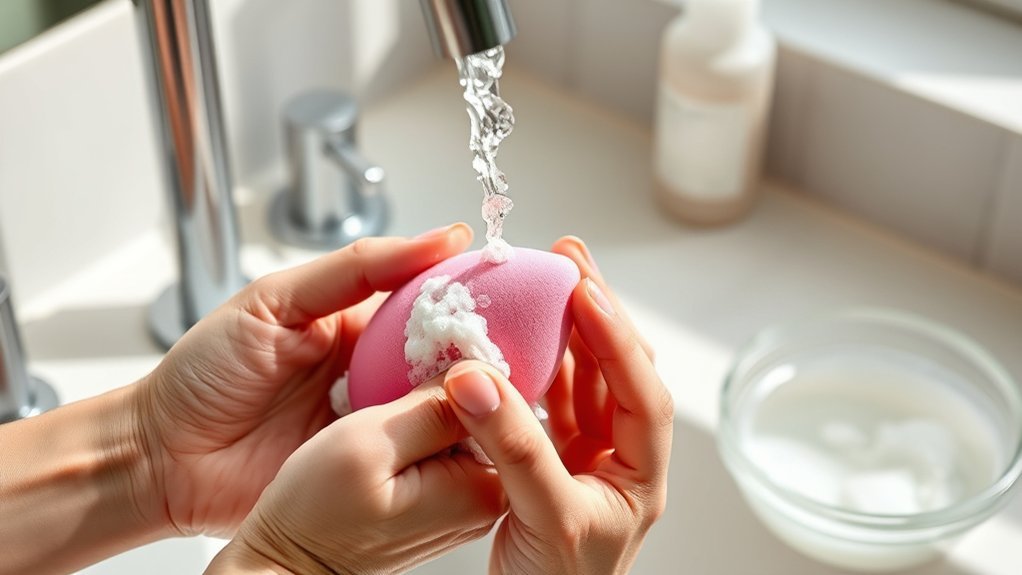
Start by wetting your Beauty Blender thoroughly to prep it for cleaning. Next, choose a gentle, soap-based cleanser designed specifically for makeup sponges to break down product buildup without damaging the foam.
Finally, rinse it under warm water until the water runs clear, then squeeze out excess moisture and let it air dry in a well-ventilated spot.
Preparing Your Beauty Blender
A clean beauty blender begins with proper preparation, setting the stage for an effective hand-wash. First, guarantee your sponge is free from any dried makeup by gently rinsing it under lukewarm water. Avoid harsh scrubbing to prevent damage.
Next, inspect your beauty blender for any tears or cracks; if you notice any, consider replacement to maintain hygiene. Disposal practices matter for your skin’s health.
When prepping for travel storage, always let your sponge air dry completely to prevent mold growth. Use a breathable container or pouch designed specifically for beauty blenders to keep it fresh and protected.
Choosing the Right Cleanser
Once your beauty blender is prepped and ready, the next step lies in selecting the perfect cleanser to restore its softness and remove makeup buildup effectively. Opt for a gentle, sulfate-free cleanser designed for facial sponges; these formulas won’t degrade your blender’s delicate material.
Avoid harsh detergents that can leave residue or dry out the sponge, especially if you plan to apply a new moisturizer afterward. Many experts recommend a mild liquid soap or a dedicated beauty sponge cleanser that breaks down foundation and concealer without compromising the sponge’s integrity.
Using the right cleanser ensures your beauty blender stays fresh, extends its lifespan, and keeps your skin healthy by preventing bacteria buildup. Remember, choosing wisely means your blender feels like new every time you clean it.
Proper Rinsing and Drying
How exactly should you rinse and dry your beauty blender to keep it in prime condition? After thoroughly cleansing, squeeze your sponge under lukewarm running water to flush out all cleanser and makeup residue.
Use your fingers or a soft cleaning tool to gently press and release trapped debris, ensuring no soap lingers. Avoid twisting or wringing, which can damage the sponge’s delicate texture.
Once rinsed, gently press the blender between a clean towel to absorb excess water. For optimal drying, place it in a well-ventilated area, avoiding enclosed spaces to prevent mildew.
Incorporate smart storage tips: opt for breathable containers or holders designed for makeup sponges. Using the right cleaning tools and drying methods consistently will extend your beauty blender’s lifespan and keep your application flawless.
How to Use a Beauty Blender Cleaner
Wondering what the best way to use a beauty blender cleaner is? Start by wetting your sponge with warm water. This preps it for deeper cleansing.
Apply a small amount of the cleaner directly onto the beauty blender, focusing on stained areas. Use your fingers to gently massage the cleaner in, creating a lather that breaks down makeup residue and oils.
For thorough cleanup, employ a gentle squeezing motion rather than harsh scrubbing to preserve the sponge’s integrity. Rinse under warm water, squeezing repeatedly until the water runs clear. Repeat if necessary.
To maximize your cleanup routine, consider two word ideas like “deep cleanse” and “quick rinse” to streamline your process. These cleanup tips ensure your beauty blender stays fresh, hygienic, and ready for flawless application.
Can You Wash a Beauty Blender in the Washing Machine?
Curious if tossing your beauty blender into the washing machine is a safe shortcut? While it might seem convenient, this approach falls into common laundry myths. Beauty blenders are delicate and porous, designed to absorb makeup, not withstand the agitation and harsh detergents of a washing machine cycle.
Machine risks include tearing, deformation, and incomplete cleansing, leaving residue trapped deep inside. Instead, hand washing with a gentle cleanser ensures you maintain the sponge’s integrity and hygiene.
If you must use a machine, consider a protective mesh laundry bag and the gentlest cycle, but be aware this still isn’t foolproof. Ultimately, ditching these laundry myths and opting for hand cleaning extends your blender’s lifespan and maintains flawless application every time.
How to Dry Your Beauty Blender Properly
Why does drying your beauty blender correctly matter just as much as cleaning it? Proper drying ensures your sponge maintains its refresh rate, preventing bacteria buildup and odor.
After rinsing, gently squeeze out excess water without twisting or wringing, which can damage the sponge’s structure. Then, place your beauty blender on a clean, open surface in a well-ventilated area to air dry fully. Avoid enclosed spaces where moisture traps.
This method not only speeds up drying but also supports color retention, keeping your blender looking fresh longer. Skip the towel-drying step, as it can leave fibers behind.
How to Keep Your Beauty Blender Fresh Longer
Maintaining your beauty blender’s freshness goes beyond just proper drying; it’s about incorporating smart habits into your routine. After each use, make sure to clean your sponge thoroughly to prevent product buildup and bacteria.
Once dry, opt for quick storage solutions like breathable pouches or mesh containers to promote airflow and avoid dampness. Avoid sealing your blender in airtight bags, which trap moisture and encourage mold.
For aroma control, consider infusing your storage area with natural sachets, like lavender or tea tree, which have antibacterial properties and keep your blender smelling fresh. Regularly replace your beauty blender every 3 months to maintain hygiene.
Frequently Asked Questions
Can I Use Soap Other Than Beauty Blender Cleaner?
You can use disinfecting alternatives like gentle, fragrance-free soaps or baby shampoo for cleaning. These gentle cleansing methods protect your beauty blender’s texture while effectively removing bacteria and residue without harsh chemicals.
Is It Safe to Share My Beauty Blender?
Think of your beauty blender as a personal fortress. Sharing it compromises your hygiene and invites contamination risk.
To keep your skin flawless, avoid swapping sponges, and always deep-clean yours regularly with a trusted cleanser.
What if My Beauty Blender Tears During Cleaning?
If your beauty blender tears during cleaning, stop using it immediately to avoid bacteria buildup. Tears worsen staining and discoloration challenges, so replace it promptly.
Use gentle cleansers and avoid harsh scrubbing to prevent future damage.
Can I Clean My Beauty Blender With Vinegar?
Wondering if cleaning vinegar’s the magic potion? You can use it cautiously, but dilute well. Undiluted vinegar risks degrading your Beauty Blender.
Prioritize safety concerns by rinsing thoroughly to avoid residue and preserve your sponge’s lifespan.
How Do I Remove Stubborn Stains From My Beauty Blender?
To tackle stubborn stain removal, soak your Beauty Blender in a mix of baking soda and gentle soap.
For alternative cleaning methods, try micellar water or a silicone brush. Both lift tough stains without damaging your sponge’s texture.
Conclusion
Keeping your beauty blender spotless is like giving your skin a fresh canvas daily. Don’t let makeup residue build up—clean it regularly with gentle cleansers to keep it soft and bacteria-free. Treat your sponge like a delicate treasure: rinse thoroughly, air dry in a breezy spot, and swap it out every three months.
With these expert tips, your beauty blender will stay flawless, helping you glow with every flawless blend. Remember, a clean beauty blender is key to achieving the perfect finish and maintaining healthy skin.