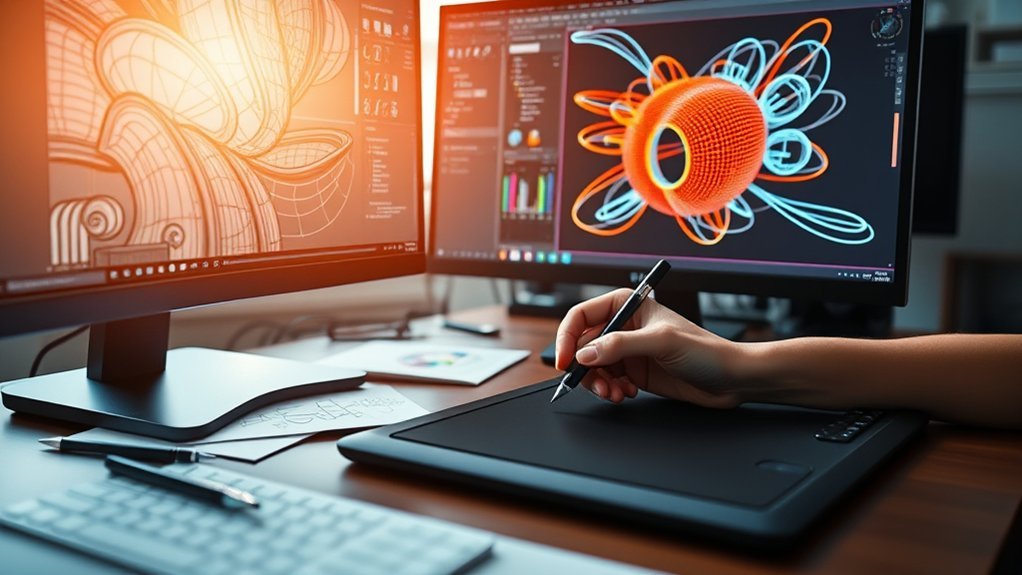
How to Use Blender
When you open Blender, you’re stepping into a thorough 3D creation suite that balances powerful features with an accessible interface. Blender offers a robust environment for artists and designers to bring their ideas to life in three dimensions.
You’ll quickly learn to add objects, navigate the viewport with orbit and zoom, and switch between Edit and Sculpt modes to shape your models precisely.
Understanding how to control these basics sets the stage for creating detailed scenes, applying materials, and bringing your work to life through animation and rendering.
But mastering these steps is just the start.
Key Takeaways
- Start by learning Blender’s interface, using orbit, pan, zoom, and customizing panels for efficient navigation and workspace management.
- Create basic 3D models by adding mesh objects, switching to Edit Mode, and using extrude and loop cut tools for shaping.
- Apply materials and textures in the Shader Editor, combining procedural nodes and image-based textures for realistic surface detailing.
- Animate objects by inserting keyframes, editing curves in the Graph Editor, and optimizing lighting for smooth motion and visual emphasis.
- Export projects through File > Export, selecting formats like FBX or glTF, and packing external data for collaboration or presentation.
Why Blender Is Perfect If You’re Just Starting Out
Why should you choose Blender when you’re just starting out in 3D modeling and animation? Blender stands out among beginner friendly alternatives because it combines a powerful, professional-grade toolset with an intuitive interface.
You’ll find detailed, customizable workspaces that adapt to your workflow, letting you focus on modeling, sculpting, or animation without overwhelming complexity. Blender’s open-source nature encourages continuous updates, ensuring you access cutting-edge features without extra cost.
Plus, the vast community support networks are invaluable. They provide tutorials, forums, and real-time help that accelerate your learning curve. Instead of struggling with isolated software, you engage with a dynamic ecosystem where troubleshooting, creative inspiration, and technical guidance are just a click away, making Blender an ideal starting point for your 3D journey.
Download and Install Blender Safely
Now that you understand Blender’s advantages for beginners, the next step is to get the software installed on your system safely. Prioritize download safety by visiting Blender’s official website to avoid malware risks.
Before installation, verify your system meets these installation prerequisites to ensure smooth operation.
| Installation Prerequisites | Download Safety Tips |
|---|---|
| OS: Windows, macOS, Linux | Use official blender.org |
| RAM: Minimum 4GB | Check file integrity (hash) |
| Disk Space: 500MB+ | Avoid third-party sources |
After downloading, run the installer with admin rights and follow on-screen prompts. This method guarantees a secure setup, preventing corrupted files or unauthorized software.
Once installed, you’re ready to dive into Blender’s powerful capabilities confidently.
Navigate Blender’s Interface Basics
You’ll start by mastering Blender’s layout panels, which organize tools, properties, and the 3D viewport into clearly defined sections. Use navigation controls like orbit, pan, and zoom to precisely position your view and interact with objects from any angle.
Getting comfortable with these basics lets you work efficiently and keeps your workflow smooth.
Understanding Layout Panels
The layout panels in Blender organize the workspace into distinct sections, each designed to streamline your workflow and provide quick access to essential tools. You’ll find panels like the Toolbar, Properties, Outliner, and Timeline, each serving specific functions from modifying object properties to managing scene hierarchy.
You can resize these panels by dragging their edges, tailoring your workspace for better focus. Panel customization lets you add, remove, or rearrange tabs to suit your needs, enhancing efficiency.
For instance, you might prioritize the Shader Editor or UV Editor depending on your task. Understanding how to manipulate these layout panels lets you create a personalized environment that accelerates your modeling, texturing, or animation processes, making Blender’s powerful interface work seamlessly for you.
Using Navigation Controls
Mastering navigation controls is key to efficiently exploring and manipulating the layout panels you’ve just learned about. In Blender, viewport navigation relies on a combination of mouse movements and keyboard shortcuts that allow you to quickly reposition your perspective.
Use the middle mouse button to rotate the view around the focal point, while holding Shift and the middle mouse button lets you pan across the scene. Zoom in and out smoothly with the scroll wheel or by holding Ctrl and dragging the middle mouse button.
These fast camera controls enable you to inspect your models from precise angles without interrupting your workflow. Familiarizing yourself with these navigation essentials will help you move fluidly through Blender’s complex interface, making your modeling and animation tasks more intuitive and efficient.
Create Your First 3D Model in Blender
You’ll start by mastering the Blender interface to position your view and select tools efficiently. Next, add basic mesh objects like cubes or spheres, then modify their shape using transform and edit modes.
Finally, apply simple materials to give your model color and texture, enhancing its visual detail.
Navigating The Blender Interface
How do you efficiently explore Blender’s complex workspace to bring your ideas to life? Start by mastering the user interface layout: the 3D Viewport, Outliner, Properties Editor, and Timeline. Use blender shortcuts like Shift + Middle Mouse Button to pan, Scroll Wheel to zoom, and Middle Mouse Button to orbit the 3D Viewport quickly.
Familiarize yourself with the toolbar on the left for quick access to transform tools and the right-side panels for detailed object properties. Employ user interface tips such as customizing workspaces and toggling overlays (press N) to declutter your view.
Understanding these navigation essentials lets you move seamlessly through your scene, setting a solid foundation before diving into modeling or animation tasks. This precision in navigation speeds up your creative process significantly.
Adding And Modifying Objects
With a solid grasp of traversing Blender’s interface, you can now add and modify objects to build your first 3D model. Start by creating primitives, basic shapes like cubes, spheres, or cylinders, using the Add menu (Shift + A).
Once added, switch to Edit Mode (Tab) to begin editing vertices. Select, move, or scale vertices to reshape your primitive precisely. Use tools like extrude (E) and loop cut (Ctrl + R) to add detail and refine form.
| Action | Shortcut/Location |
|---|---|
| Create Primitive | Shift + A |
| Switch to Edit Mode | Tab |
| Select Vertices | Right-click / Box Select (B) |
| Extrude Vertices | E |
Mastering these basics ensures efficient modeling and prepares you for complex object creation.
Applying Basic Materials
Materials bring your 3D model to life by defining how surfaces interact with light and color. To apply basic materials in Blender, start by selecting your object and opening the Shader Editor. Here, you’ll work with shader nodes, which control the material’s properties.
Begin with a Principled BSDF node. It combines multiple shading models into one and is perfect for basic materials. Adjust the basic color by clicking the color field on the Principled BSDF node, choosing a hue that suits your model.
You can tweak roughness and metallic values to refine surface reflections and texture. Connect the shader node output to the Material Output node, ensuring the material renders correctly. This node-based workflow gives you precise control over how your model visually responds to lighting.
Add Detail Using Sculpting Tools in Blender
Where do you start when you want to add intricate details to your 3D model? Dive into Blender’s sculpting tools, where sculpting brushes and dynamic topology become essential. Sculpting brushes let you carve, smooth, and pinch surfaces with precision, while dynamic topology dynamically adds mesh detail only where needed.
This approach optimizes polygon use, ensuring fine details without overloading your model.
| Sculpting Brush | Purpose |
|---|---|
| Draw | Adds clay-like volume |
| Smooth | Softens rough areas |
| Crease | Sharpens edges |
Master these tools to elevate your model’s realism, creating textures and fine features that basic modeling can’t achieve. Dynamic topology ensures your mesh adapts fluidly, making detailing intuitive and efficient.
Set Up Materials and Textures in Blender
After refining your model’s surface with sculpting tools, you’ll want to bring it to life through materials and textures that define its appearance. Start by creating a new material in the Shader Editor, where you’ll use shading nodes to control how light interacts with your model.
Combine procedural colors with image-based material textures to achieve intricate surface details without relying solely on external maps. Use nodes like Noise, Voronoi, or Gradient to generate procedural patterns, adjusting parameters for unique effects.
For more control, switch to texture painting mode to manually paint details directly onto your model, blending colors and adding imperfections that enhance realism. Layer these techniques to build complex, visually rich materials that respond dynamically to lighting and camera angles.
Animate Objects in Blender Step-by-Step
How do you bring motion to your static models in Blender? Start by selecting your object and inserting keyframes to define animation timing precisely. Use curve editing in the Graph Editor to smooth transitions and control acceleration.
Pay attention to your modeling topology; clean geometry deforms more naturally during movement. Proper lighting setups enhance your animation’s visual impact, emphasizing motion and depth.
Here’s a concise guide to streamline your animation process:
| Step | Action |
|---|---|
| 1 | Select object and insert keyframe |
| 2 | Adjust animation timing |
| 3 | Use curve editing for smoothness |
| 4 | Check modeling topology |
| 5 | Set up lighting for dynamics |
Follow these steps to create fluid, realistic animations that elevate your Blender projects.
Render Your Blender Scene Like a Pro
A professional render transforms your Blender scene into a stunning visual masterpiece by precisely managing lighting, materials, and camera settings. Start by applying conceptual color theory to harmonize hues and create mood. Use complementary colors for contrast or analogous palettes for subtlety.
Master lighting terminology: key light defines your subject’s form, fill light softens shadows, and rim light adds depth by highlighting edges. Adjust light intensity and color temperature to simulate natural or artificial sources, enhancing realism.
Fine-tune material shaders by balancing reflectivity, roughness, and subsurface scattering to mimic real-world textures. Position your camera with depth of field and focal length settings to guide the viewer’s eye.
Finally, configure render settings like samples and resolution for a noise-free, crisp output. This technical precision elevates your scene to professional quality.
Export and Share Your Blender Projects
Exporting your Blender projects efficiently guarantees your work maintains its quality and is compatible with various platforms. First, access Blender’s export options via File > Export, where you’ll find formats like FBX, OBJ, and glTF, each suited for different uses. FBX is for animation-rich models, OBJ for static meshes, and glTF for web applications.
Adjust export settings precisely: enable or disable modifiers, apply transformations, and embed textures to preserve visual fidelity. For a smooth collaboration workflow, standardize the export format across your team to avoid compatibility issues.
Additionally, consider packing all external data into your .blend file or exporting as a compressed archive to simplify sharing. Using these methods, you’ll ensure your Blender projects transition seamlessly from creation to presentation or further development.
Frequently Asked Questions
Can Blender Be Used for Video Editing?
Yes, Blender can be used for video editing. You’ll find a powerful Video Sequence Editor that lets you cut, splice, add effects, transitions, and color grade clips, giving you detailed control over your video projects.
How Do I Install Blender Add-Ons?
You install plugins by opening Blender’s Preferences, navigating to the Add-ons tab, clicking “Install,” selecting the plugin file, then enabling it.
Manage preferences carefully to ensure compatibility and optimize your workflow visually and functionally.
What Are Common Blender Keyboard Shortcuts?
You’ll find keyboard shortcuts like G to grab, R to rotate, and S to scale objects within the Blender interface.
Maneuvering with Shift + Middle Mouse lets you pan, while Ctrl + Space toggles toolbars, streamlining your workflow efficiently.
Can Blender Be Used for Game Development?
Imagine creating a detailed character model; you can use Blender for prototyping and asset pipelines, streamlining your workflow by designing, texturing, and exporting game-ready assets efficiently for engines like Unity or Unreal.
How Do I Reset Blender to Default Settings?
You can reset preferences by going to Edit > Preferences, then click Restore Defaults at the bottom. This restores the user interface and settings.
Use Profile Management to save or switch profiles after resetting Blender to default settings.
Conclusion
Now that you’ve mastered Blender’s powerful tools, you’re basically a digital wizard conjuring entire worlds from pixels and polygons. With every click, extrude, and shader tweak, you transform blank space into breathtaking 3D realities.
Remember, Blender isn’t just software—it’s your creative powerhouse, turning imagination into hyper-realistic art. So, dive in fearlessly, sculpt with precision, animate with flair, and render like a pro.
Your journey to 3D mastery is unstoppable with Blender, the ultimate tool to bring your visions to life.