How to Wash Juicer
Did you know that leaving juice pulp on your juicer can lead to bacterial growth within hours? Properly washing your juicer after every use is essential to avoid this risk and keep it running smoothly.
You’ll want to clean your machine thoroughly to prevent buildup and ensure it lasts longer. Proper cleaning not only prevents buildup but also extends the life of your juicer.
Before you start, it’s important to understand the best techniques and tools to use for effective and safe cleaning.
Key Takeaways
- Disassemble all removable parts carefully, handling sharp blades with caution and referring to the user manual for guidance.
- Rinse parts immediately after use to prevent juice residue from drying and hardening inside the juicer.
- Soak components in warm, soapy water, then use a soft brush to clean crevices and remove pulp and fiber buildup.
- Rinse thoroughly, shake off excess water, and air dry all parts completely before reassembling.
- Reassemble parts in the correct order, inspecting seals and blades for damage to ensure optimal juicer performance.
Why You Need to Clean Your Juicer Every Time
Why should you clean your juicer every time you use it? Because purging residue immediately prevents pulp and juice from drying and hardening inside the machine. If you skip this step, leftover particles can clog parts, reduce efficiency, and create unpleasant odors.
Cleaning your juicer right after use prevents residue buildup, clogs, and unpleasant odors.
You need to sanitize blades thoroughly after each use since they come into direct contact with fresh produce and can harbor harmful bacteria. Neglecting to sanitize blades risks contamination and compromises your health.
Regular cleaning also extends your juicer’s lifespan by preventing corrosion and buildup that strain its components. Taking the time to disassemble and wash your juicer right after juicing ensures optimal performance and safety.
It’s a simple step that keeps your appliance hygienic and functioning well for years.
Tips to Prevent Juicer Pulp and Juice Build-Up
How can you effectively prevent pulp and juice from building up in your juicer? Start by practicing good pulp management: remove excess pulp frequently during juicing to avoid clogging. Don’t let pulp sit inside the juicer for long, as it promotes buildup.
Rinse the juicer parts immediately after use to minimize juice oxidation, which can cause discoloration and affect taste. Avoid overfilling the juicer’s pulp container; empty it before it reaches capacity. Use cold water to rinse pulp and juice residues promptly, preventing them from drying and sticking.
Lastly, juice in smaller batches if necessary, allowing you to manage pulp accumulation more effectively. These steps help maintain your juicer’s efficiency and make cleaning easier.
Essential Tools for Cleaning Your Juicer
What tools do you need to clean your juicer thoroughly and efficiently? Proper equipment upkeep depends on using the right cleaning tools regularly, aligned with your cleaning frequency. Here’s a concise list to guide you:
| Tool | Purpose |
|---|---|
| Soft brush | Removes pulp from tight spaces |
| Microfiber cloth | Wipes exterior without scratching |
| Dish soap | Breaks down sticky juice residues |
Using a soft brush ensures you reach crevices without damaging delicate parts. A microfiber cloth helps maintain the juicer’s finish while avoiding scratches. Dish soap is essential to dissolve residues effectively.
Stick to your cleaning frequency, ideally after every use, to prevent buildup and maintain your juicer’s performance. These tools enable you to clean thoroughly and protect your investment.
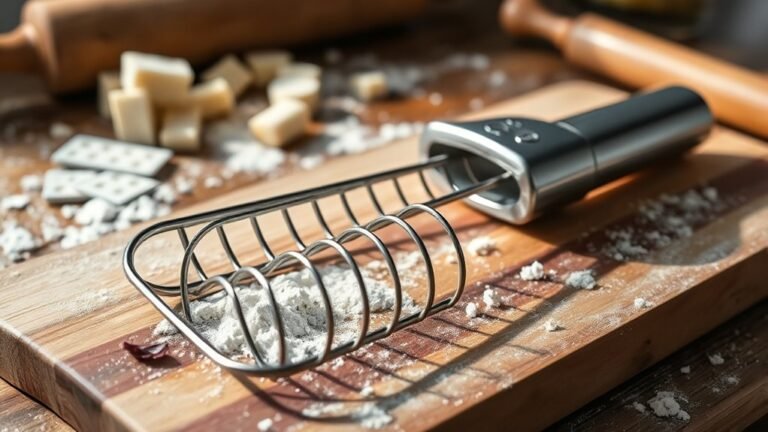
Disassembling Your Juicer for Cleaning
Before you start cleaning, carefully take apart every removable component of your juicer. This includes the pulp container, juice jug, blade assembly, and any filters. Handle each piece gently to avoid damage.
Avoid engaging in unrelated topic or off topic discussion while disassembling, as losing focus may cause you to overlook small parts or incorrectly remove components. Refer to your user manual to ensure you don’t miss any pieces or force parts apart.
Pay attention to safety, especially around sharp blades. Once disassembled, inspect parts for any stuck pulp or residue; this will make the actual washing easier. Keeping your approach methodical helps prevent damage and ensures thorough cleaning later.
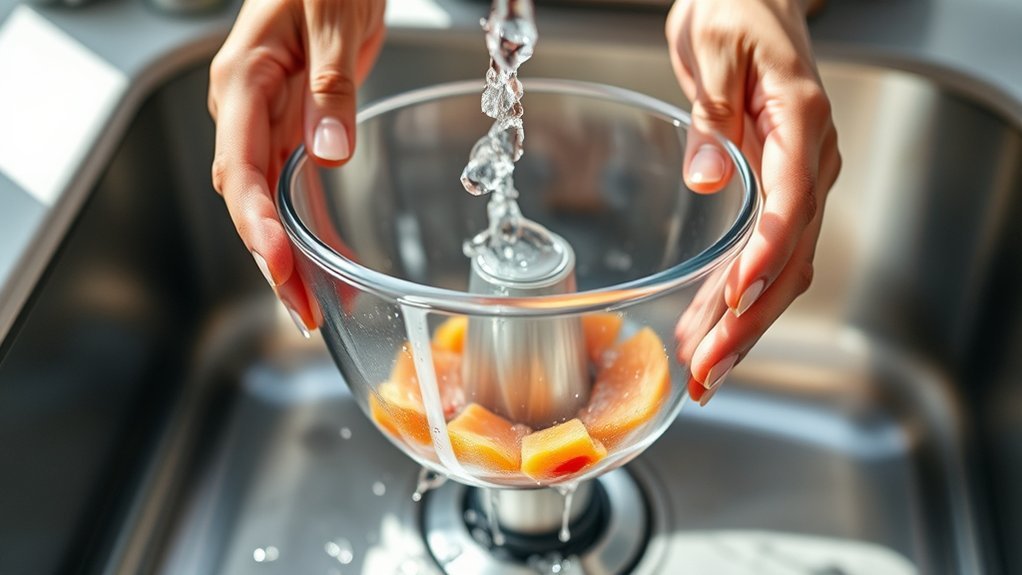
How to Wash Juicer Parts Step-by-Step
Once you’ve carefully disassembled your juicer and inspected each part for residue, you can begin the washing process. Start by rinsing all removable parts under warm water to loosen pulp and juice. Use a soft brush to clean mesh filters gently, avoiding damage.
For thorough sanitation, consider ultra sound cleaning if available; it removes stubborn debris without harming delicate components. Pay special attention to magnetic seal care. Wipe the seal gently with a damp cloth to maintain its integrity and prevent corrosion.
Avoid soaking magnetic seals or exposing them to harsh detergents. Finally, rinse all parts thoroughly and dry them completely before reassembling the juicer. This careful, step-by-step method ensures your juicer stays in optimal condition and prolongs its lifespan.
The Best Ways to Clean Your Juicer
Despite cleaning your juicer may seem straightforward, using the best methods guarantees you avoid damage and maintain hygiene effectively. Start by disassembling the juicer promptly after use to prevent residue from drying.
Rinse parts with warm water, then use a soft brush and mild detergent to clean thoroughly, avoiding harsh scrubbing that can scratch surfaces. Avoid relying on purely aesthetic features marketed as convenient cleaning aids, as these often serve more as a marketing strategy than practical benefits.
Instead, focus on thorough rinsing and drying to prevent mold or odors. Finally, dry each component completely before reassembling to maintain your juicer’s longevity.
Cleaning Hard-to-Reach Spots in Your Juicer
Although cleaning the main parts of your juicer is straightforward, hard-to-reach spots often harbor residue that can lead to mold or odors if neglected. Start by carefully removing any sticky labels, as leftover adhesive can trap dirt and moisture.
Hard-to-reach juicer spots hide residue that can cause mold and odors if not properly cleaned.
Use a soft brush or a cotton swab dipped in warm, soapy water to gently clean crevices and small openings. Avoid abrasive tools that might scratch surfaces, increasing rust risk.
After cleaning, rinse thoroughly and dry every part completely to promote rust prevention, especially on metal components. Pay close attention to areas where juice can accumulate, such as around seals and the pulp container.
Regularly inspecting and cleaning these hidden spots will keep your juicer hygienic and extend its lifespan.
Deep Cleaning Your Juicer: When and How
You’ll know it’s time for a deep clean when your juicer shows residue buildup or odors that regular washing doesn’t remove. Use a gentle brush and a vinegar solution to reach hidden parts without damaging the machine.
Aim to deep clean your juicer every few weeks, depending on how often you use it.
Signs You Need
How can you tell when your juicer needs a deep cleaning? First, notice if residue or pulp builds up in hard-to-reach areas, which can harbor bacteria and compromise juicer safety.
If your juicer emits a strange odor or your juice tastes off, it’s likely that acidic fruit juice pH has caused mineral or acid buildup. Also, check for discoloration or sticky layers on parts that contact juice, as these indicate residue accumulation.
Regular surface cleaning won’t remove these hidden contaminants, risking mold growth or mechanical issues. If you experience difficulty assembling parts or notice slower performance, these are signs that debris has clogged internal components.
Paying attention to these signs helps ensure your juicer stays hygienic and functions safely over time.
Best Cleaning Techniques
When should you perform a deep cleaning on your juicer? You should do it whenever you notice residue buildup, unusual odors, or after juicing fibrous or sticky produce. Don’t fall for cleaning myths that suggest quick rinses are enough; deep cleaning ensures thorough sanitation and prevents bacterial growth.
Start by disassembling all removable parts and soaking them in warm, soapy water. Use a soft brush to scrub hard-to-reach places, especially mesh filters and blades. Avoid harsh chemicals that can damage components or leave residues.
Rinse everything thoroughly with clean water and let parts air dry completely before reassembling. This careful approach dispels sanitation myths and keeps your juicer safe and efficient, extending its lifespan while protecting your health.
Recommended Cleaning Frequency
Why should you stick to a regular deep cleaning schedule for your juicer? Consistent deep cleaning prevents buildup of residue that can harbor bacteria, ensuring your juicer operates efficiently and safely.
While marketing jargon often promotes daily deep cleaning, a thorough wash once a week typically suffices if you clean the juicer’s core parts after each use. Nutritional myths may tempt you to rush the process, but over-cleaning won’t enhance juice quality.
Instead, focus on removing pulp, seeds, and fiber promptly, then schedule a deep clean weekly to dismantle and sanitize all components. This approach balances hygiene with practicality, extending your juicer’s lifespan without unnecessary effort.
Stick to this routine, and you’ll avoid health risks and maintain optimal performance.
How to Dry and Reassemble Your Juicer
After washing, make sure you dry each part thoroughly to prevent mold and damage. Carefully inspect components for any wear or residue before putting them back together.
Follow a clear, step-by-step process to reassemble your juicer correctly and safely.
Effective Drying Techniques
Although rinsing removes most residue, thorough drying is essential to prevent mold and maintain your juicer’s performance. Establish consistent drying routines to ensure every component dries completely before reassembly.
After rinsing, shake off excess water and place parts on a clean, dry towel or drying rack. Air drying is the safest method, as it avoids moisture buildup that can cause odors or damage. Avoid using cloths that may leave lint on surfaces.
Pay attention to tight spaces where water can hide, such as crevices and mesh filters. Once fully dry, carefully reassemble your juicer, ensuring each part fits securely. Following these effective drying techniques will help keep your juicer hygienic and functioning well for every use.
Component Inspection Tips
Once your juicer parts are completely dry, carefully inspect each component for any damage or wear before reassembling. Look for cracks, warping, or dull blades that could affect performance or safety.
Pay special attention to seals and gaskets, as compromised parts may cause leaks. Avoid jumping to conclusions based on insufficient data. If unsure about a component’s condition, consult the user manual or manufacturer’s guidelines.
Resist the urge to include unrelated topics like cleaning frequency or troubleshooting here; focus strictly on component condition. This precaution helps ensure your juicer operates efficiently and safely.
Step-by-Step Reassembly
How do you ensure your juicer goes back together correctly and safely? First, dry each part thoroughly to prevent mold and damage. Use a clean towel or air-dry on a rack.
Pay close attention to gasket maintenance; ensure the rubber seals are dry and free from cracks or debris before reassembling. Start by placing the juicer’s base on a stable surface.
Attach the filter basket carefully, aligning it with the motor shaft. Next, insert the auger or blade assembly, followed by the juicer cover.
Lock all parts securely, following your model’s instructions to maintain disassembly safety and avoid damage. Double-check each connection for tightness.
This cautious approach guarantees your juicer functions efficiently, prolonging its lifespan and ensuring safe operation.
Juicer Cleaning Mistakes You’ll Want to Skip
When you skip proper cleaning steps, your juicer can quickly accumulate residue that’s hard to remove and may affect its performance. One common mistake is neglecting to clean immediately after use; dried pulp can clog parts and reduce efficiency.
Neglecting immediate cleaning lets residue build up, clogging your juicer and hindering its performance.
Another is using harsh detergents that damage components or leave harmful residues. Avoid submerging electrical parts to prevent malfunctions.
While designing juicer recipes or marketing juicer accessories, emphasize the importance of routine cleaning to maintain product longevity. Skipping thorough rinsing after each step allows bacteria to grow, posing health risks.
Also, don’t ignore manufacturer instructions; they provide essential guidance on safe cleaning methods. By steering clear of these errors, you’ll keep your juicer running smoothly and extend its lifespan effectively.
Frequently Asked Questions
Can I Put My Juicer Parts in the Dishwasher?
You can put juicer parts in the dishwasher if the manufacturer confirms dishwasher safety. Use mild cleaning agents and avoid high heat settings to prevent damage.
Always check the manual to protect your juicer’s longevity.
How Often Should I Replace Juicer Filters or Screens?
You should replace juicer filters or screens every 3-6 months, depending on filter durability. Clean regularly with natural cleaners, avoid bleach sanitizing often, and ensure dishwasher safety to prevent damage and odor buildup between replacement intervals.
Are Natural Cleaning Agents Effective for Juicer Maintenance?
Yes, natural cleaners can effectively maintain your juicer, especially for fragrance removal. However, you should use them cautiously, ensuring they’re strong enough to clean but gentle enough to avoid damaging delicate parts or leaving residue behind.
Can I Use Bleach to Sanitize My Juicer?
Bleach use is like wielding fire, powerful but risky. You shouldn’t use chemical sanitizers like bleach on your juicer, as they can damage parts and leave harmful residues. Stick to safer, food-safe sanitizers instead.
How Do I Remove Odors From My Juicer After Cleaning?
You can remove odors by soaking parts in lemon water or vinegar overnight. Use odor removal tricks like baking soda paste on metal finish squeaks, then rinse thoroughly to avoid residue that might cause smells or damage.
Conclusion
To keep your juicer performing perfectly, prioritize prompt, proper, and precise cleaning every time. Avoid allowing pulp and particles to pile up, preventing pesky buildup and potential problems. Use soft brushes and soak parts to safely scrub stubborn spots without scratching.
Remember, regular rinsing, thorough drying, and careful reassembly preserve your juicer’s longevity. Skipping steps risks residue, rust, and ruined results. Stay sharp, stay safe, and savor smooth, spotless juicing success.
By following these tips, you ensure the best care for your appliance. Proper washing of your juicer is key to maintaining its efficiency and extending its lifespan.