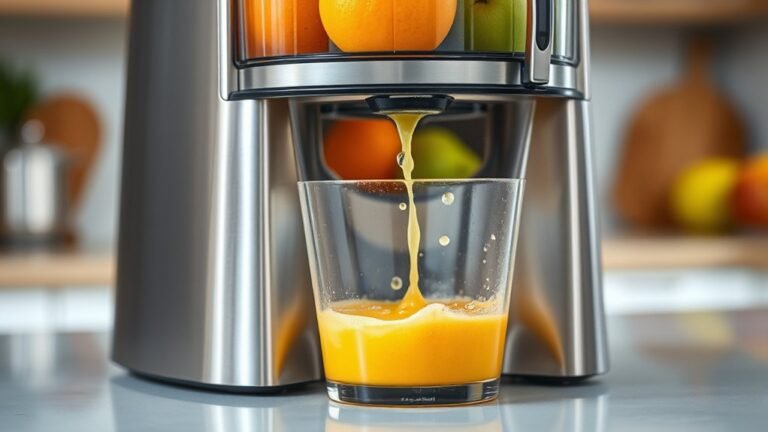
How to Use the Breville Juicer
You need to assemble the parts correctly, prepare your ingredients properly, and select the right settings for optimal juicing when using the Breville juicer. Attention to detail is crucial—from securing the pulp container and juice jug to adjusting the speed and pulp dial based on your produce.
Understanding these steps will ensure smooth operation and better juice extraction. However, there are important nuances to consider before you start juicing.
Key Takeaways
- Assemble all parts securely, aligning the pulp container, juice jug, filter basket, and locking arm until they click into place.
- Prepare ingredients by washing, peeling, and cutting them into 1 to 2 inch pieces suitable for the feed chute.
- Select the appropriate speed setting based on produce type: low for soft fruits, high for hard vegetables, or use the smoothie function.
- Monitor for jams and overheating, stopping the motor immediately if issues arise and allowing the machine to cool before resuming.
- Clean all removable parts after use, drying them thoroughly before reassembling to maintain performance and safety.
Assemble Your Breville Juicer Correctly
How do you ensure your Breville juicer is assembled correctly for optimal performance? First, align the pulp container and juice jug securely onto the base, ensuring they click into place.
Next, fit the filter basket precisely onto the motor base; an improper fit can increase noise levels, so proper assembly aids noise reduction. Insert the feed chute firmly, locking the locking arm down until it clicks, confirming a secure seal.
Always double-check components for correct placement before operation to avoid damage and maintain efficiency. Remember, improper assembly might void your warranty, so follow the user manual closely.
Regularly inspect seals and filters for wear to maintain performance and warranty compliance. Proper assembly not only optimizes juicing but also prolongs your Breville juicer’s lifespan.
How to Use Your Breville Juicer Step-by-Step
Before you start juicing, make certain to wash, peel, and cut your ingredients into sizes that fit the feed chute to guarantee smooth operation.
Always secure the juicer components firmly and keep your hands clear of the feed chute while the machine is running. Following these steps will help you operate your Breville juicer efficiently and safely.
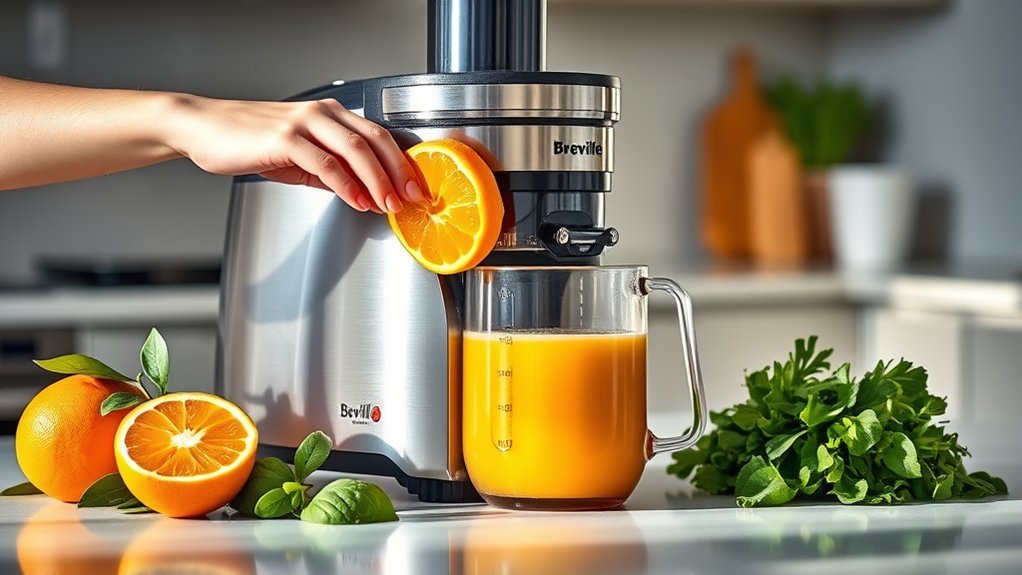
Preparing Ingredients Properly
Why does proper preparation of ingredients matter when using your Breville juicer? Proper ingredient prep ensures efficient extraction, prevents clogging, and protects your machine. Start by thoroughly washing fruits and vegetables to remove dirt and residues.
Cut ingredients into manageable sizes, typically 1 to 2 inches, to fit the feed chute easily and avoid overloading the motor. Remove hard pits, seeds, and thick skins that can damage blades or affect juice quality.
As part of your workstation setup, arrange all prepped items within reach to maintain a smooth workflow. Use a sharp knife and a clean cutting board dedicated to juicing to avoid cross-contamination.
This precise preparation minimizes downtime, maintains consistent juice flow, and extends your Breville juicer’s lifespan.
Operating The Juicer Safely
Safety remains paramount when operating your Breville juicer to ensure both effective performance and user protection. Always assemble parts correctly and never bypass safety locks.
Monitor for jams; if the motor stalls, turn off the machine immediately to maintain jam safety and prevent damage. Following these steps aligns with the juicer’s marketing angles that emphasize reliability and ease of use.
| Step | Action | Safety Tip |
|---|---|---|
| 1 | Assemble juicer securely | Ensure all parts lock firmly |
| 2 | Feed ingredients slowly | Avoid overloading to prevent jams |
| 3 | Monitor motor operation | Stop immediately if jam occurs |
| 4 | Clean after use | Unplug before cleaning for safety |
Adjust Breville Juicer Settings for Different Juices
How do you optimize your Breville juicer to handle different types of fruits and vegetables? Start by selecting the appropriate speed setting. For softer produce like berries or citrus, use the lower speed to preserve nutrients and prevent foam.
Harder items like carrots or apples require higher speeds for efficient extraction. Utilize the preset smoothies function when blending soft fruits and leafy greens, ensuring a smooth, consistent texture without over-processing.
Adjust the pulp control dial to manage the fiber content: turn it toward less pulp for smoother juice or increase it if you prefer more fiber. These precise adjustments optimize juice quality and yield.
Always refer to your model’s specific control panel to toggle between settings, ensuring your Breville juicer performs optimally for each juice type.
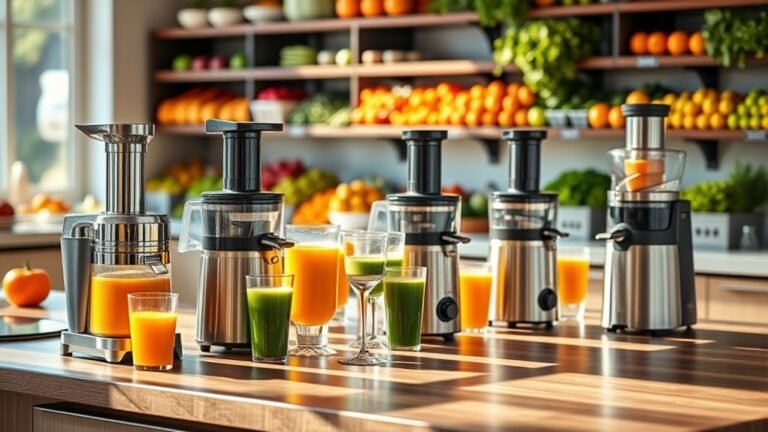
Best Fruits and Veggies to Juice With Your Breville
Fine-tuning your Breville juicer’s settings makes a significant difference, but selecting the right fruits and vegetables is equally important for optimal results. For premium juicing, prioritize firm, fresh produce like apples, carrots, and beets, which yield higher juice volume and maintain nutrient integrity.
Leafy greens such as spinach and kale complement fruit selection by adding essential vitamins without clogging the juicer. Avoid overly soft or fibrous items like bananas or avocados, as they can reduce efficiency and create pulp buildup.
Citrus fruits require peeling to prevent bitterness. Balancing high-water-content vegetables like cucumbers with dense fruits ensures smooth extraction and optimal flavor. By carefully choosing your ingredients based on texture and water content, you maximize juice yield and nutrient retention with your Breville juicer.
Tips for Getting the Most Juice From Your Breville Juicer
What steps can you take to maximize juice extraction from your Breville juicer? First, understand the types of juicing. Masticating juicers handle leafy greens better, while centrifugal types excel with hard produce.
Next, prep ingredients by cutting them into uniform sizes to guarantee consistent feeding and avoid clogging. Maintain kitchen organization by keeping tools and cleaning supplies nearby for quick assembly and cleanup, minimizing downtime.
Also, alternate between soft and hard fruits to optimize yield and prevent pulpy buildup.
| Tip | Benefit | Application |
|---|---|---|
| Uniform cutting | Consistent extraction | Slice produce into similar sizes |
| Alternate produce types | Prevents clogging | Combine soft and hard fruits |
| Organize workspace | Speeds preparation | Keep tools and cleaning items accessible |
| Feed slowly | Maximizes juice output | Avoid overloading juicer |
Fixing Jams and Overheating in Your Breville Juicer
You’ll want to start by identifying common causes of jams, such as fibrous produce or oversized pieces.
Next, carefully clear any jammed components by following the juicer’s safety guidelines to avoid damage.
Finally, take steps to prevent overheating by allowing the motor to rest during extended use and avoiding overloading the machine.
Identifying Common Jam Causes
How can you quickly identify the causes of jams in your Breville juicer? Start by examining the juice consistency; unusually thick or pulpy juice often signals excessive fiber buildup, a primary jam cause.
Next, inspect the feed chute for oversized or improperly cut produce, which can obstruct the auger’s rotation. Another common jam cause is the accumulation of dense or fibrous materials, like celery strings or pineapple cores, that resist efficient extraction.
Additionally, check for clogged filters or screens, as these restrict juice flow and increase mechanical resistance, leading to jams. Overloading the juicer with too much produce at once also strains the motor, increasing the likelihood of a jam.
Recognizing these factors lets you proactively adjust preparation and feeding methods, ensuring smoother juicing and preventing interruptions.
Clearing Jammed Components
When a jam occurs in your Breville juicer, promptly addressing the issue prevents motor strain and potential overheating. First, switch off and unplug the unit to ensure safety.
Disassemble the feed chute and auger carefully, inspecting for lodged fibrous or hard materials causing the jam. Use the provided cleaning brush or a wooden tool to gently dislodge debris without damaging internal components.
Avoid forcing parts apart, as this can void your warranty. After clearing, reassemble securely before testing.
For effective jam prevention, cut produce into smaller pieces and avoid overloading the feed chute. Regular cleaning and inspection maintain optimal function and support warranty compliance.
Always consult the user manual for specific instructions to safeguard your juicer and uphold your warranty rights.
Preventing Overheating Issues
Why does your Breville juicer overheat during use? Overheating often occurs when the motor works excessively due to clogged or jammed components, causing strain.
To ensure juicing safety and effective overheating prevention, always avoid overloading the juicer with hard or fibrous produce in one go. Pause periodically to check for jams, and clear any obstructions promptly. Use the pulse function for tough ingredients to reduce continuous motor stress.
Additionally, maintain proper cleaning after each use to prevent residue buildup that can hinder operation. If your juicer feels hot, switch it off and let it cool for at least 15 minutes before resuming.
Following these practices minimizes motor strain, enhances juicing safety, and significantly reduces the risk of overheating issues.
Disassemble and Clean Your Breville Juicer Easily
Wondering how to keep your Breville juicer performing at its best? Start by mastering proper disassembly techniques. First, unplug the juicer and remove the pulp container, juice jug, and feed chute.
Carefully detach the filter basket and the blade assembly to avoid damage. Handle each component gently to maintain their integrity.
Gently remove the filter basket and blade assembly to prevent damage and keep your juicer parts intact.
Next, choose appropriate cleaning solutions. Mild dish soap works well for routine cleaning, while a mixture of water and white vinegar can remove stubborn residue.
Use a soft brush to scrub the mesh filter thoroughly, ensuring no pulp clogs remain. Rinse all parts under warm water and dry them completely before reassembling.
Following these steps helps maintain hygiene, preserves your juicer’s efficiency, and prepares it for your next use without hassle.
Maintain Your Breville Juicer for Long-Lasting Performance
How often you maintain your Breville juicer directly impacts its longevity and performance. Regular upkeep prevents breakdowns and ensures your juicer runs smoothly without voiding warranty terms. Always consult the manual for edge cases like unusual noises or leaks, as addressing these promptly can save costly repairs.
To maintain optimal function, focus on:
- Inspecting and replacing worn parts, especially the filter and seals.
- Lubricating moving components as recommended to reduce friction.
- Thoroughly drying parts after cleaning to prevent corrosion.
Creative Juice Recipes to Try With Your Breville Juicer
Where can you find inspiration to maximize your Breville juicer’s capabilities? Start by exploring creative juicing techniques that combine nutrient-rich ingredients with complementary flavors.
For precise flavor pairing, balance sweet fruits like apples or pineapples with tart elements such as kale or lemon. Incorporate herbs like mint or ginger to enhance complexity without overpowering the juice.
Use your Breville juicer’s variable speed settings to optimize extraction for different produce textures, ensuring maximum yield and nutrient retention. Experiment with layering ingredients: denser vegetables first, followed by softer fruits to prevent clogging and promote smooth operation.
Document your recipes, noting ingredient ratios and juicer settings, so you can replicate successful blends. This methodical approach elevates your juicing experience, unlocking your Breville’s full potential through inventive, nutrient-dense, and delicious creations.
Frequently Asked Questions
Can I Use My Breville Juicer for Making Nut Milk?
You can’t make nut milk directly with your Breville juicer since it’s designed for juice extraction, not blending. However, it efficiently separates pulp for nut butter, letting you manually mix pulp with water to create nut milk afterward.
Is the Breville Juicer Dishwasher Safe?
Yes, your Breville juicer has dishwasher compatibility for most removable parts. For maintenance tips, always check your model’s manual, and hand wash delicate components to ensure longevity and optimal performance over time.
What Is the Warranty Period for the Breville Juicer?
Think of your Breville juicer as a trusty steed guarded for two years. Its warranty terms cover defects, offering repair options to keep it running smoothly.
This ensures your investment stays protected and productive throughout this period.
Can I Juice Leafy Greens Without Clogging the Juicer?
Yes, you can juice leafy greens without clogging the juicer. For clog prevention, alternate leafy greens with firmer produce, avoid overloading, and clean the filter basket frequently.
This helps maintain optimal juice flow and prevent buildup.
Are Replacement Parts for the Breville Juicer Readily Available?
Yes, you’ll find replacement parts for the Breville juicer widely available through Breville’s official website, authorized dealers, and online marketplaces. This offers multiple availability options to ensure you can maintain and repair your juicer efficiently.
Conclusion
Now that you know how to assemble, operate, and maintain your Breville juicer, you’re set to enjoy fresh, nutrient-rich juices effortlessly. Did you know that juicing can boost your daily vegetable intake by up to 30%? By selecting the right speed and adjusting the pulp dial, you maximize yield and flavor while preventing jams.
Regular cleaning and maintenance ensure your juicer performs optimally for years—making every juice experience smooth and efficient. With these tips, you can fully enjoy the benefits and convenience of your Breville juicer.