How to Juice Apples Without a Juicer
If you don’t have a juicer, don’t worry—you can still enjoy fresh apple juice without one using just a few simple tools. Imagine washing crisp, fragrant apples, chopping them into chunks, and gently simmering them until soft and fragrant.
Then, you’ll mash or strain the softened fruit to release its natural sweetness. There’s a straightforward process to get clear, flavorful juice without fancy equipment, and a few tricks can make it even better.
Key Takeaways
- Chop apples into small pieces and mash them thoroughly using a potato masher or wooden spoon.
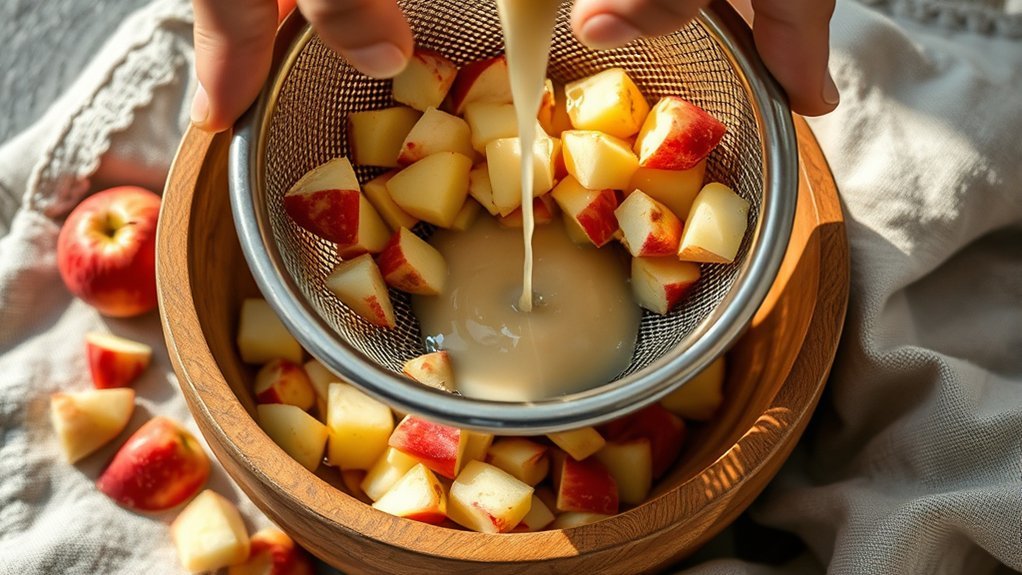
- Simmer chopped apples with a splash of water until soft, then mash and press through a fine sieve.
- Blend apple chunks with a little water, then strain the mixture through cheesecloth or a fine mesh strainer.
- Prevent browning by rinsing apple pieces in lemon water or cold water with vinegar before juicing.
- Store juice in airtight glass containers refrigerated, and add flavor enhancers like lemon, cinnamon, or honey if desired.
How to Juice Apples Without a Juicer
Wondering how you can enjoy fresh apple juice without a juicer sitting on your counter? Start by chopping your apples into small chunks, then simmer them gently in a pot with a splash of water until they’re soft and fragrant.
Next, mash the softened apples using a potato masher or press them through a fine sieve to extract the juice. To amp up the taste, add flavor boosters like a squeeze of lemon, a pinch of cinnamon, or a drizzle of honey.
When it’s time to store your homemade juice, pour it into an airtight container and keep it refrigerated. This is a key tip for storage to maintain freshness and prevent oxidation. This method is simple, flavorful, and perfect for any kitchen.
Essential Kitchen Tools for Juicing Apples
You’ll often find that having the right kitchen tools makes juicing apples not only easier but more enjoyable. Start with a sturdy cutting board and a sharp knife to slice your apples cleanly.
The right kitchen tools make juicing apples easier and more enjoyable, starting with a sharp knife and sturdy cutting board.
A fine mesh strainer or cheesecloth helps you extract every drop of juice by pressing and squeezing the pulp. Don’t forget a large bowl to catch the juice and a wooden spoon to mash the apples effectively.
For storing your fresh juice, airtight glass jars are perfect. Try some clever storage hacks like freezing juice in ice cube trays for later use.
Finally, add a creative garnish, like a cinnamon stick or a thin apple slice on the rim, to elevate your homemade juice presentation beautifully.
Preparing Apples for Juicing Without a Juicer
How do you get the most juice from apples without a juicer? Start by carefully washing and drying them. Use a sharp peeler to remove the skin in thin, even strips. This helps reduce bitterness without losing too much flesh.
Next, cut the apples into small chunks to make pressing easier. To prevent oxidation, which turns your apple pieces brown, immediately toss them in a bowl with a little lemon juice or soak them briefly in cold water with a splash of vinegar.
This simple step keeps your apple slices fresh and appetizing. By focusing on careful peeling and oxidation prevention, you set the stage for extracting maximum juice in the next steps, keeping your apples vibrant and flavorful throughout the process.
Juicing Apples With a Blender
You’ll want to start by cutting your apples into small chunks, making sure to remove the core and seeds for a smoother blend. Toss the pieces into your blender with a splash of water to help everything whirl together evenly.
Once blended, you’ll strain the mixture through a fine mesh or cheesecloth to squeeze out every drop of fresh, golden juice.
Preparing Apples Properly
Wondering how to get your apples ready for juicing with a blender? Start by choosing fresh, seasonal varieties like crisp Fuji or tangy Granny Smith to bring out natural sweetness and vibrant flavors.
Rinse each apple thoroughly under cool water to remove any dirt or residue. Next, core and slice them into small chunks; this helps your blender handle the fruit more easily and prevents chunks from getting stuck.
If you have allergen considerations, peel the apples to reduce potential irritants, especially if you’re sensitive to apple skins. Also, check for any bruised or damaged spots and remove them to keep the juice smooth and fresh-tasting.
Proper preparation sets the stage for blending a perfectly flavorful apple juice every time.
Extracting Juice Efficiently
A blender can transform those prepared apple chunks into fresh juice with ease and speed. Start by adding the apples to the blender along with a splash of water to help everything blend smoothly. Pulse the mixture until it turns into a thick, pulpy liquid.
For juicing safety, avoid overfilling the blender and make sure the lid is secure to prevent spills. Once blended, strain the mixture using a fine mesh sieve or cheesecloth to separate the juice from the pulp.
To enhance flavor pairings, try adding cinnamon, ginger, or a squeeze of lemon before blending for a tasty twist. This method is quick, safe, and delivers a vibrant, fresh apple juice without needing special equipment.
Extracting Juice by Mashing and Straining Apples
Start by washing and chopping your apples into small pieces to make mashing easier and more efficient. Use a sturdy bowl and a potato masher or wooden spoon to crush the fruit until it’s soft and pulpy.
Then, strain the mash through a fine mesh cloth or sieve, pressing firmly to extract every drop of fresh juice.
Preparing Apples Properly
How exactly do you get the most juice out of apples without a juicer? Start by selecting fresh, firm apples. Avoid bruised or overly soft ones, as they’ll yield less juice and can introduce off-flavors.
Wash them thoroughly to remove dirt and pesticides; peeling is optional but can affect flavor and texture. When prepping, chop apples into small chunks to make mashing easier.
Keep storage tips in mind: if you’re not juicing immediately, store cut apples in a cool place or refrigerate to prevent browning. Don’t forget safety considerations: use a sharp knife carefully to avoid slips, and clean your workspace to prevent cross-contamination.
Properly prepared apples will release juice more efficiently when you mash them, setting you up for a smoother juicing experience.
Effective Straining Techniques
Once your apples are chopped and ready, it’s time to focus on getting every last drop of juice out of them. First, mash the apples thoroughly. Don’t worry about the apple peels; they add flavor and nutrients. Use a sturdy spoon or potato masher to break down the fruit into a pulpy, wet mixture.
Next, line a fine mesh strainer or cheesecloth over a bowl. Pour the mashed apples in, then press firmly with the back of a spoon or twist the cloth tightly to extract the juice. For better juice clarity, let the juice sit for a few minutes so sediment settles at the bottom before pouring it off.
This simple straining method ensures you enjoy fresh apple juice without needing a juicer.
Using Cheesecloth for Clear Apple Juice
Although pressing apples by hand can yield plenty of juice, you’ll want to use cheesecloth to separate the clear liquid from the pulp for a smoother, more rejuvenating drink. Lay a large piece of cheesecloth over a bowl, then pour your freshly pressed apple mash onto it.
Gather the cloth edges, twisting gently to start the cheesecloth filtration process. As you squeeze, you’ll notice the juice dripping clear and bright, leaving behind thick pulp in the cloth. This pulp separation ensures your apple juice is crisp and free from unwanted bits.
The fine mesh of the cheesecloth acts like a natural filter, catching tiny solids while letting the liquid flow through. When you’re done, unwrap the cloth and enjoy crisp, clear apple juice made without any fancy tools.
Juicing Apples With a Manual Press or Sieve
First, you’ll want to wash and chop your apples into small pieces to make pressing easier. Then, pack the fruit tightly into your manual press or place it in a fine sieve, ready to squeeze out every drop of juice.
With steady pressure, you’ll watch the golden liquid slowly drip, capturing all that fresh apple flavor.
Preparing Apples Properly
How do you get the most juice out of your apples without a fancy juicer? Start by choosing the right apple varieties. Crisp, juicy types like Fuji, Gala, or Honeycrisp work best. Their naturally high water content means more fresh juice.
Next, pay close attention to preparation timing. Wash your apples thoroughly and cut them into small chunks right before juicing to prevent browning and maintain freshness. Removing the core and seeds is essential to avoid bitterness.
If you’re using a manual press or sieve, chopping the apples finely helps release juice more easily. Remember, fresher apples give sweeter juice, so avoid letting them sit too long after cutting. Proper preparation sets the stage for a smooth, flavorful juicing experience.
Extracting Juice Efficiently
Where do you begin when extracting juice from apples without an electric juicer? Start with a ripe selection. Choose apples that are firm and fragrant for the best flavor and natural sweetness.
Slice them into small pieces to maximize surface area, which helps enzyme boosts kick in, breaking down the fruit for easier juicing. If you’re using a manual press, load the chopped apples tightly into the basket.
Turn the handle steadily, applying consistent pressure to squeeze out every drop of juice. No press? No problem. Use a fine-mesh sieve or cheesecloth over a bowl, pressing the pulp down firmly with the back of a spoon.
This method takes patience, but it’s effective. The juice you extract will be fresh, vibrant, and packed with natural enzymes to energize your drink.
Tips to Boost Flavor When Juicing Apples
Wondering how to make your homemade apple juice burst with even more flavor? Start by focusing on flavor balance and sweetness adjustments. You can mix different apple varieties to create a richer taste or add a splash of lemon juice to brighten the flavor. A pinch of cinnamon or ginger can also elevate the aroma and warmth.
| Tip | Description |
|---|---|
| Mix apple varieties | Combine sweet and tart apples for balance |
| Sweetness adjustments | Add honey or sugar sparingly to enhance taste |
| Citrus addition | A squeeze of lemon/lime adds brightness |
| Spice it up | Cinnamon, nutmeg, or ginger add warmth |
| Chill before serving | Cold juice tastes fresher and more refreshing |
Use these tricks, and your apple juice will taste vibrant and irresistible!
How to Store Fresh Apple Juice
When you’ve just made fresh apple juice, keeping it fresh and flavorful is key to enjoying every last drop. To do this, pour your juice into a clean glass jar or bottle with an airtight lid. Avoid metal containers, as they can cause storage corrosion, altering the taste and safety of your juice.
Store your juice in the refrigerator, where cool temperatures slow down spoilage and improve shelf stability. If you want to keep it longer, consider freezing the juice in small portions, leaving some space for expansion. Always label your container with the date to track freshness.
Fix Common Problems When Juicing Apples
Why does your apple juice sometimes turn out cloudy or bitter? It’s usually due to oxidation or leftover pulp. To fix this, start by straining your juice through a fine mesh or cheesecloth to remove sediment, giving you a clear, crisp drink.
If bitterness lingers, try a citrus pairing. Adding lemon or orange juice brightens the flavor and balances acidity. For variety, consider a mango substitution in your blend; its sweetness mellows tart apples beautifully.
Keep these tips in mind:
- Use fresh apples and juice immediately to reduce browning.
- Stir in lemon juice right after juicing to prevent cloudiness.
- Experiment with mango substitution for a smoother, sweeter profile.
These simple tricks help you enjoy fresh, vibrant apple juice every time.
Frequently Asked Questions
Are Certain Apple Varieties Better for Juicing Than Others?
Yes, you’ll find the best varieties for juicing have vibrant flavor profiles. Think sweet Fuji or tart Granny Smith. Their juicy flesh bursts with flavor, giving your juice a refreshing, balanced taste that’s hard to beat.
Can Apple Juice Be Frozen Without Losing Flavor?
You can freeze apple juice without losing flavor, but careful freezing methods matter. To keep juice texture smooth and avoid pulp separation, freeze in airtight containers, leaving space for expansion. This helps preserve that crisp, fresh taste perfectly.
How Long Does Homemade Apple Juice Stay Fresh in the Fridge?
You’ll get about 3 to 5 days of fresh apple juice storage in your fridge before juice spoilage kicks in.
Keep it in a sealed container to slow oxidation and maintain that crisp, golden color and sweet taste.
Is It Necessary to Peel Apples Before Juicing?
Think of peeling as unwrapping a gift. Sometimes you want the smooth surprise inside. You don’t have to peel apples, but peeling vs blending textures changes your juice’s feel.
Skins add earthiness and nutrients, blending a rustic charm.
Can I Mix Other Fruits With Apples When Juicing Without a Juicer?
You can definitely mix other fruits with apples when juicing without a juicer. Using juicing techniques like blending and straining helps you achieve a smooth texture, while balancing flavors keeps your juice fresh and delicious.
Conclusion
Now that you know how to juice apples without a juicer, you can enjoy fresh apple juice anytime!
Did you know the average American eats about 16 pounds of apples yearly? Imagine turning those crisp, fragrant apples into sweet, homemade juice right in your kitchen. With just simple tools and a bit of patience, you’ll savor every drop of natural, delicious juice.
Perfect for revitalizing sips or cozy cinnamon-spiced treats. Give it a try and taste the difference when you learn how to juice apples without a juicer!