How to Work a Toaster
When you use a toaster, start by placing the toaster on a stable, heat-resistant surface and plugging it in securely. Insert slices evenly without forcing, then lower the lever to activate the heating elements.
Selecting the right setting is essential—begin with medium and adjust based on bread type and desired browning.
Understanding these steps will help you avoid common mistakes, but mastering the nuances of toaster settings and safety requires a closer look.
Key Takeaways
- Plug in the toaster and place it on a stable, heat-resistant surface.
- Insert bread slices evenly into the slots without forcing them.
- Lower the lever gently to start the heating elements.
- Adjust the browning control dial based on bread type and desired toast darkness.
- Wait for the toaster to pop automatically before removing the toast.
How to Use Your Toaster: The Basics
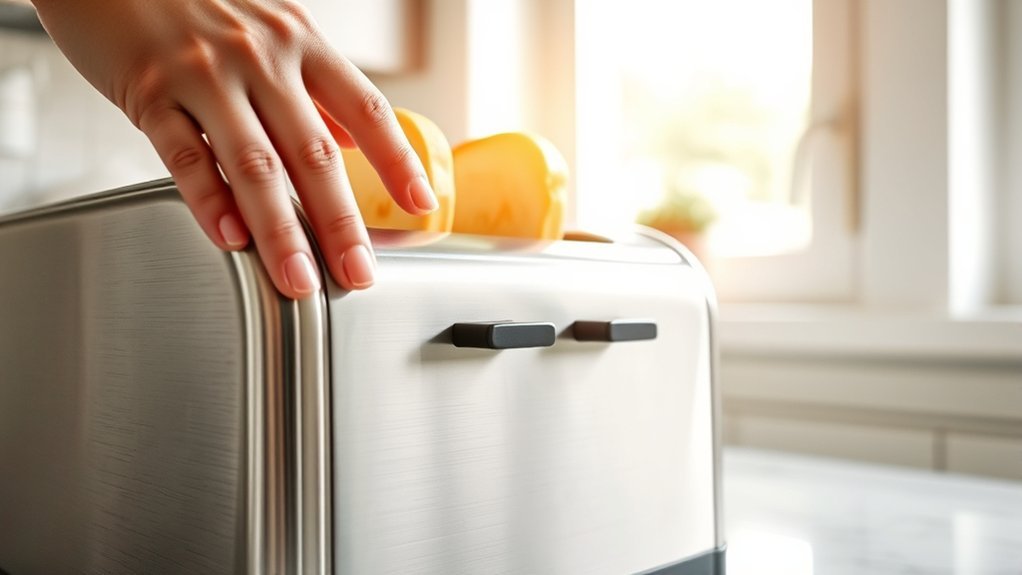
How exactly do you operate a toaster to achieve perfect results? First, ensure the appliance is plugged in and placed on a stable, heat-resistant surface. Insert your bread slice(s) into the designated slots, making sure they fit evenly without forcing.
Avoid using oversized items, as they’re generally not applicable to standard toaster slots. Next, gently lower the lever to engage the heating elements. The subject matter here is straightforward: the toaster uses electrical resistance to generate heat and brown the bread.
Wait until the toaster automatically pops the bread up, which signals completion. Avoid manually forcing the lever back up during operation, as this risks malfunction. Understanding these basics prepares you for more advanced settings and troubleshooting.
How to Set Your Toaster for Perfect Toast Every Time
You’ll start by selecting the correct setting that matches your bread type and thickness. Next, adjust the toast darkness control to balance browning without burning.
Finally, test your choices with timed trials to fine-tune for consistent, perfect results every time.
Choosing The Right Setting
Selecting the correct toaster setting is pivotal to achieving consistently perfect toast. When choosing the right setting, you need to consider bread thickness and moisture content, as these variables affect heat absorption.
Most toasters feature numerical dials or buttons; lower numbers correspond to shorter toasting times, while higher numbers extend exposure to heat. For optimal results, start with a medium setting and adjust incrementally based on your preference.
Ensure the setting aligns with your bread type. Thicker slices require longer durations than thinner ones. This subtopic emphasizes two word discussion ideas like “heat control” and “time adjustment” to guide your choices precisely.
Adjusting Toast Darkness
After determining the appropriate toaster setting based on bread thickness and moisture, fine-tuning the toast darkness becomes your next focus. Proper darkness control ensures you achieve consistent results without burning or under-toasting.
When adjusting toast darkness:
Use the toaster’s dial or digital controls to set a baseline darkness level. Incrementally increase or decrease settings based on previous results, noting changes in crust color and texture.
Account for variations in bread type, as denser breads require slightly higher settings. Avoid large adjustments; small, precise changes yield better control and predictable outcomes.
Testing And Timing
When should you start timing your toast to achieve consistent results? Begin the testing timing as soon as you press the lever down to engage the heating elements. This marks the precise start point for your calibration notes.
Use a stopwatch or timer to record the exact duration until the toast reaches your desired color and texture. Perform multiple trials at different settings, documenting time and toast outcome meticulously.
Analyze your calibration notes to identify the setting that yields optimal toast consistently. Remember, external factors like bread moisture and slice thickness affect timing, so adjust accordingly.
How to Customize Your Toaster Settings for Preferences
How exactly do you tailor your toaster settings to match your specific preferences? Start by evaluating the toaster ergonomics to ensure easy access to controls and a comfortable grip when adjusting settings. Proper cord management prevents tangling and allows you to position the toaster optimally on your counter.
Begin by assessing toaster ergonomics and cord placement for effortless control and ideal countertop positioning.
Next, fine-tune these critical aspects:
- Adjust the browning control dial incrementally to achieve your desired toast color.
- Use the defrost or reheat functions for frozen or previously toasted bread.
- Experiment with the toast timer to balance crispness and warmth.
- Monitor the toaster’s slot width and depth to accommodate different bread thicknesses.
How to Toast Different Types of Bread and Pastries
Fine-tuning your toaster settings lays the groundwork for handling various types of bread and pastries with precision. Different textures and moisture levels require distinct heat intensity and timing. For instance, thinner slices like white bread toast faster, while denser pastries need extended cycles.
Proper crumb management is essential to prevent buildup in the toaster nook, reducing fire risk and ensuring consistent toasting. Regularly clean crumbs to maintain performance.
| Bread/Pastry Type | Recommended Setting |
|---|---|
| White Bread | Medium heat, short cycle |
| Rye Bread | Medium-high heat, longer cycle |
| Croissants | Low heat, extended cycle |
Adjust settings accordingly and monitor the toaster nook to optimize results for each type.
How to Toast Bagels, Waffles & Frozen Foods
Why treat bagels, waffles, and frozen foods differently in your toaster? Understanding the bagel science and waffle texture helps you optimize toasting for each. Bagels require a unique setting because their dense interior and chewy crust need more heat on the cut side, while waffles demand careful timing to preserve their crispness without burning. Frozen foods, meanwhile, need longer toasting to thaw and cook evenly.
To toast these effectively:
- Use the “bagel” setting to apply more heat to one side, enhancing bagel crust.
- Select a medium setting for waffles to maintain waffle texture without sogginess.
- Extend toasting time for frozen items to ensure thorough heating.
- Avoid overcrowding slots to promote even air circulation and consistent results.
This technical approach ensures perfect toasting every time.
How to Use Your Toaster Safely and Avoid Hazards
Mastering the proper settings for bagels, waffles, and frozen items is only part of achieving optimum toaster performance. Guaranteeing safe operation is equally important. For toast safety, never insert metal objects to retrieve stuck items; always unplug first.
Manage crumbs by regularly emptying the crumb tray to prevent fire hazards. Avoid placing the toaster near flammable materials and guarantee proper ventilation.
| Action | Risk if Ignored | Resulting Emotion |
|---|---|---|
| Insert metal objects | Electric shock | Anxiety |
| Ignore crumb buildup | Fire hazard | Fear |
| Block ventilation | Overheating | Worry |
| Use near water | Short circuit | Alarm |
| Leave unattended | Burns or fire | Regret |
Following these guidelines will keep your toaster both effective and safe.
How to Clean and Maintain Your Toaster for Longevity
You should regularly remove and clean the crumb tray to prevent buildup that can affect toaster performance and pose a fire risk.
Use a soft, damp cloth to wipe down the exterior, avoiding abrasive materials that might damage the finish. Consistent maintenance guarantees your toaster operates efficiently and extends its lifespan.
Regular Crumb Tray Cleaning
How often should you clean your toaster’s crumb tray to ensure optimal performance and safety? Ideally, you should empty and clean the crumb tray weekly, especially if you use your toaster daily. Accumulated crumbs pose fire hazards and can interfere with toaster cord safety if they fall near the plug or outlet.
To clean the crumb tray effectively:
Unplug the toaster to prevent electrical hazards. Remove the crumb tray gently to avoid damaging the mechanism. Dispose of crumbs in the trash; avoid shaking crumbs near bread storage areas to prevent contamination. Wipe the tray with a damp cloth and dry thoroughly before reinserting.
Regular cleaning maintains efficient heating and prolongs your toaster’s lifespan while minimizing fire risk.
Exterior Wipe Down
Keeping the crumb tray clean prevents internal buildup, but maintaining the toaster’s exterior also plays a significant role in its overall performance and lifespan. An effective exterior wipe down not only preserves the toaster finish care but also prevents grime from affecting buttons and levers.
Use a damp, soft cloth with mild detergent; avoid abrasive materials that can scratch the surface. Dry thoroughly to prevent moisture damage.
| Step | Tool Needed | Purpose |
|---|---|---|
| Unplug toaster | None | Ensure safety |
| Wipe surface | Soft cloth | Remove dust and spills |
| Clean crevices | Cotton swab | Remove dirt from edges |
| Dry thoroughly | Dry cloth | Prevent rust and stains |
| Polish finish | Microfiber cloth | Maintain toaster finish care |
Quick Fixes for Common Toaster Problems
Why does your toaster sometimes fail to heat evenly or get stuck mid-cycle? Understanding burner physics and toast chemistry helps diagnose these issues. Uneven heating often stems from faulty heating elements disrupting consistent thermal conduction, while mechanical jams interrupt cycle completion.
Quick fixes include:
- Inspect and clean crumb trays to prevent obstructions affecting the lever mechanism.
- Verify heating elements glow uniformly; replace any visibly damaged or non-functioning elements.
- Test the toaster’s thermostat for accurate temperature regulation to maintain proper toast chemistry.
- Lubricate or realign the lever mechanism if it sticks, ensuring smooth ejection and cycle completion.
Choosing the Right Toaster Based on Features and Budget
When selecting a toaster, what features best align with your daily needs and budget constraints? Focus on core functions like browning control, slot width, and defrost settings.
If counter space is limited, prioritize a compact design without sacrificing performance. Also, evaluate budget friendly models that deliver durability and essential features.
| Feature | Consideration |
|---|---|
| Browning Control | Adjustable for precise toasting |
| Slot Width | Wide slots for bagels, thick bread |
| Defrost Function | Useful for frozen bread |
| Size | Compact design saves space |
| Price Range | Budget friendly options start around $20 |
Frequently Asked Questions
Can I Use My Toaster to Warm up Sandwiches?
Yes, you can use your toaster for sandwich warming. Toaster sandwiching requires careful placement to avoid jams, ensuring even heat distribution.
This warming versatility makes it efficient, but avoid thick fillings that may cause mechanical issues or uneven toasting.
What Is the History of the Toaster Invention?
You know what they say, “Rome wasn’t built in a day.” The toaster invention’s history evolution began in 1893 with Crompton’s electric model, advancing through Nichrome wires and pop-up mechanisms to today’s precise, efficient heating technology.
How Do Toasters Affect Energy Consumption at Home?
You’ll notice toaster efficiency directly impacts energy consumption; choosing a high-efficiency model reduces heating time and power use. This enables significant energy savings by minimizing wasted electricity during each toasting cycle at home.
Are There Any Eco-Friendly Toaster Brands Available?
Yes, you can find eco friendly toasters like Breville and Cuisinart models featuring energy saving features such as rapid heat technology and automatic shutoff, reducing electricity use while maintaining consistent toasting performance and durability.
Can I Make Toaster Recipes Beyond Just Bread?
You can definitely make various toaster recipes beyond bread varieties, like toaster pastries or reheating pizza.
Always follow toaster safety guidelines to avoid burns or fires by not inserting metal objects or overheating non-bread items.
Conclusion
Using your toaster correctly is as straightforward as following a precise recipe. Plug it in, place your bread evenly, select the right setting, and avoid lifting the lever mid-cycle to ensure consistent results.
Customize settings for different breads and frozen items while maintaining safety protocols. Regular cleaning and timely troubleshooting keep your toaster functioning smoothly.
With careful handling and proper maintenance, you’ll enjoy perfectly toasted slices every time, just like a well-oiled machine running flawlessly. Mastering how to work a toaster ensures delicious results and longevity of your appliance.