How to Clean a Blender
You might think that rinsing your blender immediately after use is enough to keep it clean, but residue often remains in hard-to-reach areas. To ensure thorough cleanliness when learning how to clean a blender and maintain your blender’s performance, you need to follow a precise process starting with safe disassembly and proper cleaning techniques.
Understanding how to handle each component correctly can prevent damage and prolong your blender’s lifespan—here’s what you need to know.
Key Takeaways
- Always unplug the blender before disassembling to ensure safety and prevent accidental activation.
- Remove and clean the pitcher, lid, seals, and blade assembly with warm soapy water or a quick blend cycle.
- Handle blades carefully, scrub gently with a soft brush, rinse under warm water, and dry thoroughly to avoid damage.
- For deep cleaning, use a vinegar and baking soda mixture to deodorize and remove stubborn residue, then rinse well.
- Clean the motor base by wiping with a damp cloth, never submerge it, and ensure all parts are dry before storage.
Why Clean Your Blender After Every Use
Why should you clean your blender immediately after use? Prompt cleaning prevents residue buildup, which can cause bacterial growth and unpleasant odors. Removing food particles right away ensures the two word idea 1, “blade assembly,” remains sharp and functional, avoiding corrosion or dullness from dried debris.
Additionally, timely cleaning supports the two word idea 2, “motor base,” by preventing spills from seeping into electrical components, reducing risk of damage or malfunction. You’ll also save time since dried-on substances require more effort to remove.
How to Safely Disassemble and Prepare Your Blender
Before cleaning your blender, you need to safely disassemble it to access all parts. First, unplug the blender to ensure blender safety and prevent accidental activation. Remove the pitcher from the base, then detach the lid and any removable seals or gaskets.
Carefully unscrew the blade assembly from the pitcher base by turning it counterclockwise; use a wrench if necessary to avoid damaging components. Handle the blades with caution to prevent injury. Separate the blade assembly from the pitcher for thorough cleaning.
Inspect all parts for wear or damage as part of routine tool maintenance. Place small components in a secure area to avoid loss. Proper disassembly sets the foundation for effective cleaning and prolongs your blender’s lifespan.
How to Safely Clean Blender Blades
Once you’ve carefully separated the blade assembly from the pitcher, you can focus on cleaning the blades without risking damage to other components. Prioritize blade safety by handling the sharp edges with care to avoid cuts and preserve blade integrity. Proper blade cleaning also supports motor maintenance by preventing residue buildup that strains the motor.
Follow these steps to clean blender blades safely:
- Use a soft brush or sponge to scrub the blades gently.
- Avoid submerging the blade assembly completely in water to protect the bearings.
- Rinse under warm running water to remove loosened debris.
- Dry blades thoroughly with a clean cloth to prevent rust and corrosion.
- Inspect blades for damage or dullness to ensure optimal performance and motor efficiency.
This method ensures blade longevity and protects your blender’s motor.
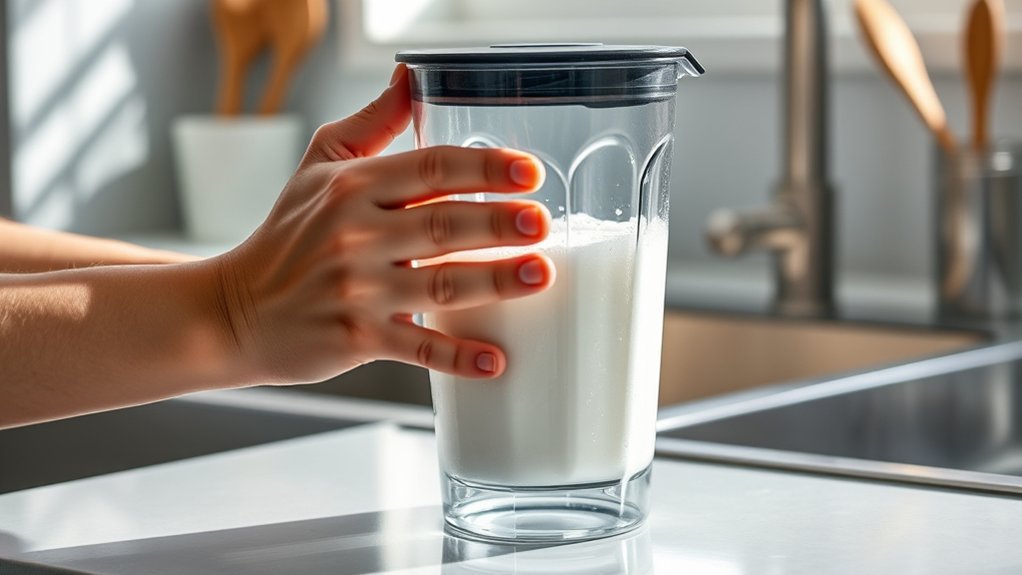
How to Quickly Clean Your Blender With Soap and Water
To quickly clean your blender, add warm water and a few drops of dish soap into the pitcher. Secure the lid and blend on high for 30 to 60 seconds to loosen residue.
Finally, rinse thoroughly with clean water and dry before storing.
Add Soap And Water
How do you efficiently remove leftover residue from your blender without disassembling it? Start by adding soap and water directly into the blender jar, considering the blender material to avoid damage. Use an eco friendly cleaning approach by selecting biodegradable dish soap. Here’s how to proceed:
- Fill the blender jar halfway with warm water.
- Add a few drops of eco friendly dish soap.
- Ensure water level stays below the blender’s maximum fill line.
- Avoid harsh chemicals that can degrade certain blender materials like plastic or rubber seals.
- Secure the lid tightly to prevent leaks during cleaning.
This method loosens stuck particles and prepares the blender for the next cleaning step while preserving your appliance’s longevity and supporting sustainable cleaning practices.
Blend On High
A powerful blender cycle on high speed efficiently dislodges and removes residue from the jar. After adding soap and water, secure the lid firmly to guarantee blender safety during operation.
Start the blender on low speed, then gradually increase to high to prevent motor strain. Run the blender for 30 to 60 seconds; this duration optimizes motor maintenance by avoiding overheating while thoroughly cleaning blades and surfaces.
Avoid running the blender dry or overextending the cycle, as this risks damaging the motor. Once the blend cycle finishes, switch off and unplug the unit before proceeding to the next cleaning step.
Following these precise actions ensures effective residue removal while preserving your blender’s functionality and longevity through proper motor maintenance and safe operation.
Rinse And Dry
Where should you start once the blender cycle finishes? First, carefully remove the jar from the base. Immediately rinse dry the jar and blade assembly under warm running water to remove loosened residue.
Next, follow these steps:
- Detach the blade assembly for thorough cleaning if possible.
- Use a clean cloth to wipe seal and jar edges, preventing mold or buildup.
- Dry all components with a lint-free towel to avoid water spots.
- Leave parts separated to air dry completely before reassembly.
- Inspect the base for spills; wipe it with a damp cloth, avoiding electrical parts.
How to Deep Clean Your Blender With Vinegar and Baking Soda
To deep clean your blender, use vinegar and baking soda for their natural deodorizing and degreasing properties. Start by adding baking soda to the blender jar, then pour in vinegar to create a fizz that loosens residue.
After the reaction subsides, scrub and rinse thoroughly to remove stubborn stains and odors.
Vinegar and Baking Soda Benefits
Two common household ingredients, vinegar and baking soda, offer an effective solution for deep cleaning your blender. Understanding vinegar benefits and baking soda advantages helps you tackle stubborn residues and odors efficiently.
Vinegar’s acetic acid breaks down mineral deposits and dissolves grime, while baking soda’s mild abrasiveness lifts stuck particles without scratching surfaces. Combined, they create a fizzing reaction that enhances cleaning power.
Key benefits include:
- Neutralizes odors inside the blender jar
- Removes tough stains and residue buildup
- Disinfects by killing bacteria and mold
- Safe for plastic and glass components
- Environmentally friendly alternative to harsh chemicals
Step-by-Step Cleaning Process
Although cleaning your blender might seem straightforward, following a precise step-by-step process guarantees a thorough deep clean using vinegar and baking soda. First, detach the blender jar from the base and remove the blade assembly carefully, using appropriate cleaning accessories like a soft brush and sponge.
Pour one cup of white vinegar into the jar and add one tablespoon of baking soda; the mixture will fizz, aiding residue removal. Let it sit for 10 minutes, then scrub gently. Rinse thoroughly with warm water.
Reassemble the blender after drying all parts completely. For safety reminders, always unplug the blender before cleaning and handle the blades with care to avoid injury. This method ensures your blender stays hygienic and extends its operational life efficiently.
How to Remove Stubborn Odors and Stains
Why do stubborn odors and stains linger in your blender even after regular cleaning? They embed in the nooks of the blade assembly and container surface, resisting standard washing. To ensure effective stain removal and eliminate stubborn odors, follow these steps precisely:
Fill the blender halfway with warm water and add a tablespoon of baking soda. Blend on high for 30 seconds to loosen residues. Rinse thoroughly with warm water.
For persistent odors, wipe the container with a cloth soaked in white vinegar. Air dry completely before reassembling to prevent moisture buildup.
This method targets odor-causing bacteria and pigment residues, restoring your blender’s cleanliness without damaging its components.
How to Clean Dishwasher-Safe Blender Parts
A dishwasher-safe blender simplifies your cleaning routine by allowing you to place designated parts directly into the dishwasher. Before loading, disassemble the blender carefully, separating the jar, lid, and blade assembly if removable.
Confirm each component is labeled dishwasher safe to prevent damage during the wash cycle. Place smaller parts on the top rack to avoid warping from the heating element. Use a mild detergent and select a gentle cycle to maintain the integrity of seals and plastic components.
After the cycle, inspect parts for residual food particles and dry thoroughly to prevent mold growth. Following these maintenance tips ensures efficient cleaning without compromising your blender’s durability or performance.
Avoid washing the motor base in the dishwasher, as it’s not dishwasher safe and requires hand cleaning only.
How to Maintain Your Blender for Longer Life
How often you perform routine maintenance markedly affects your blender’s lifespan and performance. To ensure optimal blending ergonomics and extend motor life, follow these essential steps:
Regularly check and tighten blade assembly to prevent leaks and motor strain.
Clean motor base vents to avoid overheating and maintain efficient airflow.
Use your blender within recommended capacity to reduce motor overload.
Inspect power cord and plug for damage to ensure safe operation.
Store the blender in a dry, dust-free area to protect internal components.
Frequently Asked Questions
Can I Use Bleach to Disinfect My Blender?
You can use bleach to disinfect your blender, but practice bleach safety by diluting it properly and rinsing thoroughly.
Alternatively, consider bleach alternatives like vinegar or hydrogen peroxide for effective, safer disinfection without harsh chemical risks.
How Often Should I Replace Blender Blades?
You should consider blades replacement every 6 to 12 months, depending on usage frequency and wear. Regular inspection guarantees optimal blending safety, preventing dullness or damage that could compromise performance and cause accidents.
Is It Safe to Blend Hot Liquids in My Blender?
Blending hot liquids is like handling a ticking time bomb; you must follow safety precautions. Always vent the lid, avoid overfilling, and start on low speed to prevent pressure build-up and dangerous splatters.
Can I Clean My Blender With Lemon Juice?
Yes, you can clean your blender with lemon juice. Its natural acidity provides effective citrus cleaning, breaking down residues and neutralizing odors.
Blend lemon juice with water, then rinse thoroughly for a fresh, sanitized container.
What Should I Do if My Blender Leaks?
If your blender leaks, first check the blender gasket for damage or misalignment. Remove, clean, and dry the gasket thoroughly. Replace it if worn.
Proper gasket sealing prevents leaking during cleaning and blending tasks.
Conclusion
Regularly cleaning your blender not only maintains its performance but also prevents bacteria buildup—studies show kitchen appliances harbor 200 times more bacteria than a toilet seat. By following proper disassembly and cleaning techniques, you protect your blender’s components and extend its lifespan.
Quick soap-and-water cleans work for daily use, while vinegar and baking soda tackle deeper grime. Consistent care ensures your blender stays efficient and safe for every blend.
To keep your appliance in top shape, make cleaning your blender a regular part of your kitchen routine.